Electrical meter installation is the process of mounting, wiring, and connecting the device that measures how much electricity your home or business uses — and getting it right matters for safety, accurate billing, and utility compliance.
Here’s a quick overview of what the process involves:
| Step | What Happens |
|---|---|
| 1. Plan the location | Choose an outdoor, accessible spot at the correct height |
| 2. Install the meter socket | Mount and wire per NEC and utility specs |
| 3. Connect service conductors | Run wiring from utility point to the panel |
| 4. Utility inspection and connection | Utility connects and energizes the meter |
| 5. Post-install testing | Verify accuracy and proper function |
A few key rules apply in almost every situation:
- The utility owns the meter — your electrician installs the socket; the utility installs the actual meter
- Clearances matter — most utilities require at least 3 feet of unobstructed space in front of the meter
- Permits are required — in Ohio, meter and service work requires an electrical permit and inspection
- Never tamper with the meter — it is illegal and dangerous
I’m Aaron, owner of Buckeye Electrical Solutions LLC, and I’ve overseen dozens of permitted electrical meter installation and service upgrade projects across Northeast Ohio. Whether you are upgrading your service, selecting the right electric wire for a home, or looking for professional home electrical services, this guide covers everything you need to know. We can also help you understand related upgrades, such as estimating the cost of a home generator.
Understanding Electric Meter Types and Ownership
To understand how an electrical meter installation works, we must first look at the technology measuring your power. Over the last few decades, metering technology has shifted from mechanical discs to digital and wireless communication networks.
Analog, Digital, and Smart Meters
For decades, the standard was the analog (electromechanical) meter. These recognizable units feature a spinning metal disc driven by the electromagnetic fields generated by current passing through the meter. The disc turns a series of gears that move clock-like dials on the face. While highly durable, analog meters must be read manually by a utility worker walking your property.
Digital meters replaced spinning discs with solid-state electronics and digital LCD screens. These units are highly accurate and measure voltage and current directly, but they still require manual or drive-by reading via short-range radio signals.
Today, smart meters—also known as Advanced Metering Infrastructure (AMI)—are the standard. As of 2022, approximately 72% of U.S. residences had a smart meter installed. These devices record consumption in real-time or near-real-time intervals (often every 15 to 60 minutes) and transmit this data directly to your utility company via secure radio frequency (RF) mesh networks or cellular signals.
If you live in Ohio, you have likely experienced this transition. Major regional utilities have rolled out massive smart meter initiatives. For instance, you can learn more about how these devices communicate and transmit data from Smart Meters | AES Ohio. If you are scheduled for an upgrade, you can read about what to expect during the physical swap directly from Meter Installation – FirstEnergy.
Division of Ownership and Maintenance
One of the most common points of confusion for property owners is who actually owns the electrical equipment on the side of the house. The boundary line is straightforward but strict:
- The Utility Company Owns: The physical electric meter itself, the incoming overhead service drop wires (up to the point of attachment), or the underground lateral wires up to your property line.
- The Customer Owns: The meter socket (the metal box the meter plugs into), the service mast (the conduit pipe extending up the side of your home or through the roof), the weather head, and the service entrance conductors running from the socket into your main electrical breaker panel.
Because you own the meter socket, you are solely responsible for its maintenance, repair, and replacement. If a storm damages your service mast or the meter socket rusts out, the utility company will disconnect the power for safety, but they will not repair the equipment. You must hire a licensed electrical contractor to perform the repairs, pull the necessary permits, pass an inspection, and then coordinate with the utility to have the power restored.
Key Requirements for Safe Electrical Meter Installation
Installing or upgrading a meter socket is not a weekend DIY project. It requires strict adherence to national safety standards, regional utility regulations, and state building codes.
First and foremost, any electrical meter installation must comply with the National Electrical Safety Code (NESC) and the National Electrical Code (NEC). In Ohio, our statewide electrical standards are updated periodically. It is important to note that Ohio’s 2023 NEC adoption includes expanded GFCI requirements in several locations, qualifying specific rules (like kitchens) as situational rather than universal based on distance and configuration. Keeping up with these shifting code requirements is essential to ensure your property passes local municipal inspections.
Before beginning any service modifications, we always consult the official utility handbook for your specific provider. For example, if you are in the AEP Ohio service territory, you must follow the specifications outlined in the Guide for Electric Service and Meter Installations.
Additionally, before any newly installed or repaired meter socket can be energized by the utility, it must undergo a formal inspection. You can learn how to prepare for this process by reading Power Up Safely: Your Guide to Electric Meter Inspections.
Code-Compliant Clearances for Electrical Meter Installation
Clearances are designed to keep utility workers, inspectors, and your family safe. When planning an electrical meter installation, we must carefully measure the surrounding space.

Height Requirements
The physical height of the meter socket is strictly regulated so that utility technicians can safely read, service, or pull the meter without using a ladder.
- Overhead Service Drops: The centerline of the meter must be mounted between 4 feet and 6 feet above the final, finished grade.
- Underground Service Laterals: The centerline of the meter must be mounted between 3 feet and 6 feet above the finished grade.
Working Space Clearances
You must maintain a completely unobstructed working space in front of and around the meter assembly.
- Front Clearance: A minimum of 3 feet (36 inches) of clear, unobstructed working space must be maintained directly in front of the meter face. This space must extend from the ground up to a minimum height of 6 feet, 6 inches.
- Side Clearance: A minimum of 18 inches of side clearance is required on both sides of the meter socket to allow technicians room to work safely.
- No Obstructions: You cannot plant bushes, build decks, install dog runs, or mount other equipment (like AC condensers) within this designated clearance zone.
Separation from Gas Facilities
To eliminate combustion risks, there must be physical separation between your gas setup and your electrical setup.
- Utilities require a minimum of 3 feet of separation between natural gas meters/regulators and electric meters or service equipment.
- When possible, a 10-foot clearance is highly preferred between the natural gas meter assembly and any potential electrical ignition sources, including air intakes, doors, and windows.
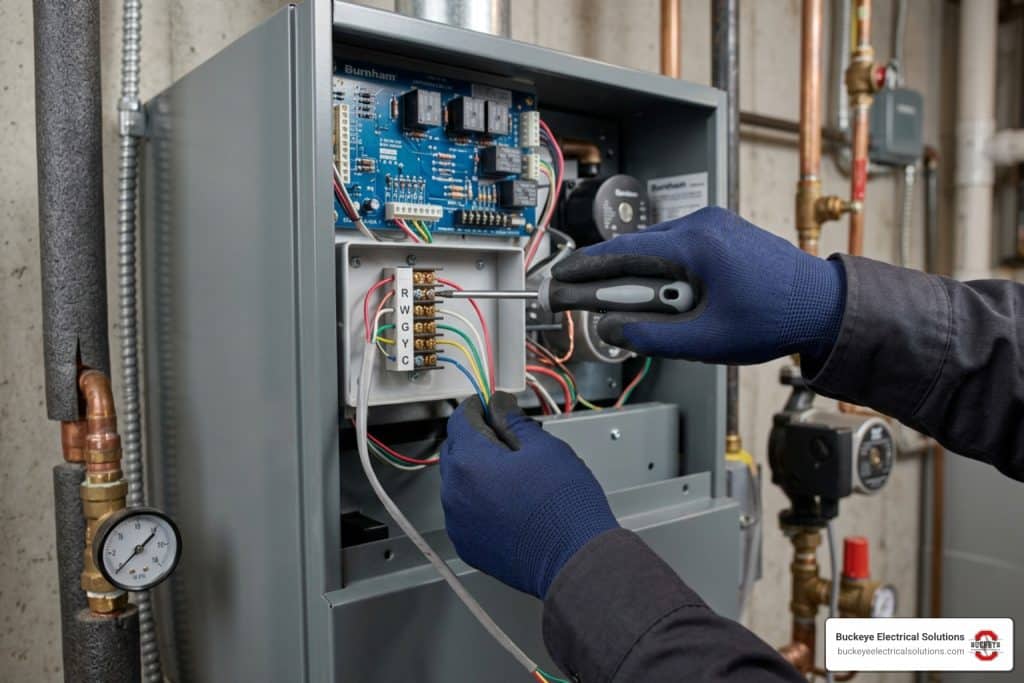
Wiring and Grounding in Electrical Meter Installation
Proper wiring and grounding are the backbone of a safe electrical service. During an electrical meter installation, several critical components must be executed flawlessly:
- The Grounding Electrode System: The meter socket and your main electrical panel must be properly bonded and connected to the earth. This is typically achieved by running a continuous grounding electrode conductor from the ground lugs within the meter base to two driven ground rods spaced at least 6 feet apart. The independent ground rod should be installed within 2 feet of the service entrance.
- Conduit Specifications: For the above-ground supply side of the meter, utilities generally require a minimum of 2-inch Schedule 80 PVC or rigid metallic conduit to protect the heavy service conductors from physical damage.
- Weather Head and Drip Loop: For overhead services, the service mast must extend through the roof or high up the side of the wall. The service entrance conductors must extend a minimum of 24 inches beyond the weather head. This extra length allows the utility company to splice their service drop wires and create a “drip loop,” which prevents rainwater from running down the wires and entering the meter socket.
Smart Meters, Net Metering, and Solar Integration
As renewable energy systems expand across Northeast Ohio, the way we install and configure electric meters is shifting. If you are planning to install solar panels, your standard electrical meter installation will require specific upgrades to handle two-way power flow.
Bidirectional Metering and Net Metering
Traditional electric meters are designed to measure electricity moving in one direction: from the utility grid into your home. If you install a solar grid, your system will often produce more electricity during peak daylight hours than your home can consume. This excess energy is pushed back onto the utility grid.
To track this, you must have a bidirectional meter. These meters are programmed to measure both “delivered” electricity (grid to home) and “received” electricity (home to grid). Under Ohio’s net metering rules, your utility company credits you for the excess power you export. If you already have an advanced smart meter installed, it may already support bidirectional programming, but your solar contractor and utility must formally reprogram or swap the unit before your solar system is given Permission to Operate (PTO).
Solar Current Transformers (CTs) and Remote Metering
Modern energy storage and smart home systems, such as the Tesla Powerwall, require highly precise sub-metering to manage power distribution between the grid, your solar panels, your battery, and your home loads.
During these installations, specialized remote meters and Current Transformers (CTs) are placed inside your electrical panels. For example, if you are setting up a home battery backup, you or your installer must follow the technical specifications to Install the Tesla Remote Meter and CTs.
CTs are clamp-on sensors that measure the current flowing through a conductor without disconnecting the wire. When installing CTs:
- Orientation is Critical: The CT must be oriented correctly, usually with the white text or arrow pointing toward the primary power source (e.g., pointing toward the grid for site CTs, or toward the inverter for solar CTs).
- Secure Closure: The CT must snap completely shut around the conductor. Any gap will result in inaccurate readings and system communication errors.
- Distance Limits: Communication wiring between remote meters and CTs must not exceed specified maximum distances to prevent signal degradation and maintain revenue-grade accuracy.
Rates and Communication
Smart meters communicate your usage patterns throughout the day, enabling utilities to offer Time-of-Use (TOU) rate structures. Under TOU rates, electricity is more expensive during peak hours (usually late afternoon and evening) and cheaper during off-peak hours (overnight).
By integrating smart meters with solar storage systems, you can program your home batteries to discharge during expensive peak hours, saving you money without changing your daily habits.
Residential vs. Commercial and Multi-Occupancy Metering
An electrical meter installation varies significantly depending on the type of property and the electrical load it demands.
Residential Services
Most single-family residential homes utilize a self-contained, single-phase, three-wire 120/240-volt service rated at 100, 150, or 200 amps. In these installations, the entire electrical current flows directly through the physical meter itself. The meter socket is relatively compact and mounted directly to the exterior wall of the home.
Commercial and Large Services (CT Cabinets)
For commercial buildings or large residential properties requiring services over 400 amps or 75 kVA, the sheer volume of electrical current is too high to pass directly through a standard meter.
In these cases, we install a Current Transformer (CT) cabinet. The CT cabinet contains heavy bus bars and donut-shaped current transformers. These transformers scale down the high current to a lower, safer level (usually under 5 amps), which is then routed through smaller wires to a transformer-rated meter mounted nearby. CT cabinets require extensive coordination with the utility, specific mounting heights, and NEMA 3R weather-resistant enclosures.
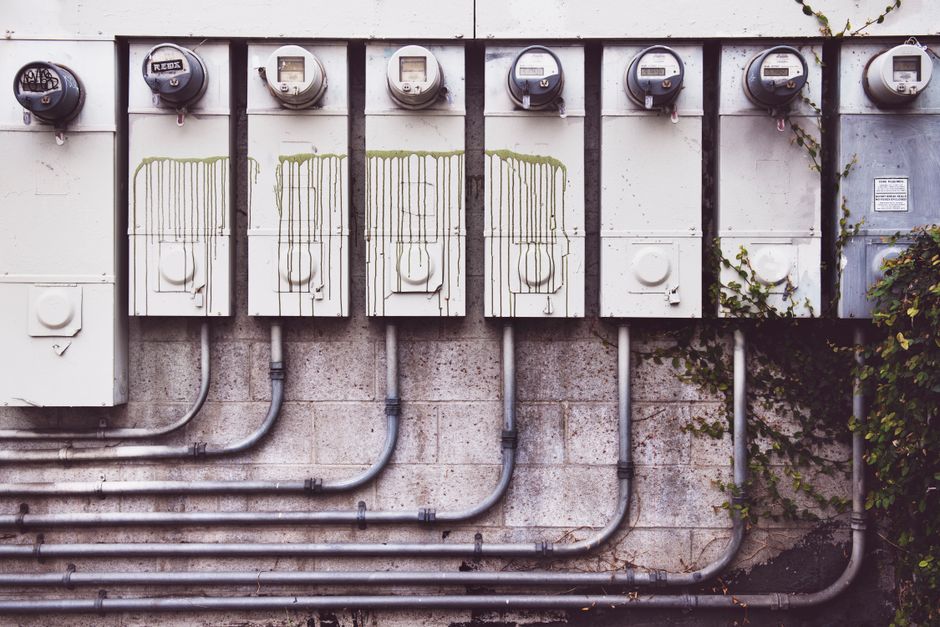
Multi-Occupancy and Multi-Gang Services
Apartment buildings, strip malls, and duplexes require multiple meters grouped together in a “multi-gang” configuration.
- Grouping: All meters must be grouped at a single, easily accessible outdoor location.
- Permanent Labeling: Each individual meter socket must be permanently and legibly marked with a highly durable, UV-resistant label (at least 1 inch high) indicating the specific unit or apartment it serves. Mislabeling a multi-family building can lead to years of billing disputes and safety hazards.
- Common Area Meters: For multi-family buildings, utilities and local building codes restrict common area meters (which power shared hallways, exterior lighting, or boiler rooms) from feeding any habitable tenant spaces.
Temporary Service Installations
During construction or major renovations, builders require temporary power. This involves installing a temporary service pole—typically a pressure-treated 4×6 timber buried at least 4 feet deep—equipped with a weather-resistant meter socket, a main disconnect, and GFCI-protected outlets. Once the permanent structure is built and inspected, the temporary service is decommissioned, and the permanent electrical meter installation is completed.
To understand the broader scope of how these systems are inspected and approved, you can read The Shocking Truth: What to Expect from an Electrical Inspection for Your New Home.
Post-Installation Testing, Calibration, and Troubleshooting
Once the physical electrical meter installation is complete, the system must be configured, tested, and verified.
Accuracy Classes
Utility-grade electric meters are built to incredibly tight tolerances. They are grouped into standard accuracy classes (0.1, 0.2, and 0.5), meaning their error rates under test conditions do not exceed 0.1%, 0.2%, and 0.5% respectively. For commercial facilities, meters may be integrated with Power Monitoring Expert (PME) software, allowing managers to track power factor, harmonic distortion, and voltage fluctuations in real-time.
Troubleshooting Common Installation Issues
Improper wiring during a service upgrade or meter installation can lead to severe safety hazards, equipment damage, or billing discrepancies. The table below outlines common issues we encounter, their likely causes, and their priority levels:
| Common Service / Meter Issue | Likely Causes | Priority Level |
|---|---|---|
| High Billing / Meter Spinning Fast | Ground-to-neutral short, bootleg ground, or neighboring circuit cross-connection | High |
| Intermittent Power / Flickering Lights | Loose terminal lugs in meter socket or corroded service drop connection | Urgent |
| Outlet has no voltage; could indicate breaker, GFCI, switch, or wiring issue | Tripped breaker, improper wiring, open neutral, or failed GFCI outlet | Medium |
| Unbalanced Phase Voltages | Uneven load distribution across phases or failing transformer | High |
If you are experiencing electrical anomalies in your home, it is vital to systematically inspect your system. You can use our comprehensive guide, The Home Electrical Inspection Checklist: Don’t Get Zapped by Surprises, to spot warning signs early.
For a deeper dive into resolving specific inspection findings, see Outlet Overhaul: Decoding Your Electrical Inspection Results. If you are planning an upgrade and need to budget for these essential safety checks, check out Budgeting for Safety: Your Guide to Electrical Inspection Pricing. All electrical service pricing and estimates are subject to change and dependent on local site conditions or AHJ (Authority Having Jurisdiction) requirements.
Frequently Asked Questions about Electric Meter Installation
Do I need to be home for a smart meter installation?
In most cases, no. If your electric meter is located on the exterior of your building and is readily accessible (gates are unlocked, pets are secured indoors, and there are no physical obstructions), you do not need to be present.
However, the technician will need to briefly interrupt your electrical service (usually for 10 to 15 minutes) to safely swap the physical meter. It is a good idea to shut down computers and sensitive electronics before the scheduled installation window to prevent data loss.
Who is responsible for repairing a damaged meter socket?
You are. While the utility company owns and maintains the physical meter glass and the internal electronic measuring components, the homeowner is entirely responsible for the metal meter socket box, the conduit mast, the weather head, and the wiring inside. If your meter socket is rusted, damaged by a fallen tree limb, or pulling away from your home, you must hire a licensed electrician to repair or replace it.
Do I need a new electric meter if I install solar panels?
Usually, yes—or at least your existing meter must be reprogrammed. Standard meters only track energy flowing in one direction. To participate in net metering and receive credits on your utility bill, you must have a bidirectional meter that accurately measures power flowing both to and from the utility grid. Your solar installer will coordinate with your utility company to ensure the correct meter is in place before your system is turned on.
Conclusion
An electrical meter installation is a highly regulated, technically demanding project that serves as the gateway between your property and the utility grid. From selecting the proper outdoor location and maintaining strict code clearances to ensuring a continuous grounding system, every detail is critical for safety and code compliance.
Because service upgrades and meter socket replacements involve working directly with high-voltage utility lines, they should only be performed by experienced, licensed professionals. At Buckeye Electrical Solutions, we have over 20 years of experience serving homeowners and businesses throughout Northeast Ohio. We handle the entire process—including permits, utility coordination, physical installation, and final inspections—to ensure your project is completed promptly and safely.
If you are planning an electrical meter installation, upgrading your panel to accommodate an EV charger, or need a professional inspection, we are here to help. Contact us today to discuss your project, and explore our full range of services by visiting Buckeye Electrical Solutions Services.