Why Attaching a Ceiling Fan to an Electrical Box the Right Way Matters
Attaching a ceiling fan to an electrical box is one of those home projects where the details typically count. Ceiling fans can often weigh up to 50 pounds — and they spin, vibrate, and run for hours at a time. The junction box holding all of that up typically needs to be the right one, installed according to local standards.
Here’s what you need to know at a glance:
| Step | What to Do |
|---|---|
| 1. Verify the box | Confirm it is typically UL-listed and marked “For Use With Ceiling Fans” |
| 2. Check the screws | Fan boxes typically require 10-24 or 10-32 screws — not standard 8-32 light fixture screws |
| 3. Confirm structural support | Box should typically be secured to a ceiling joist or a fan-rated expandable brace |
| 4. Verify power | Verify the circuit is off at the breaker with a voltage tester |
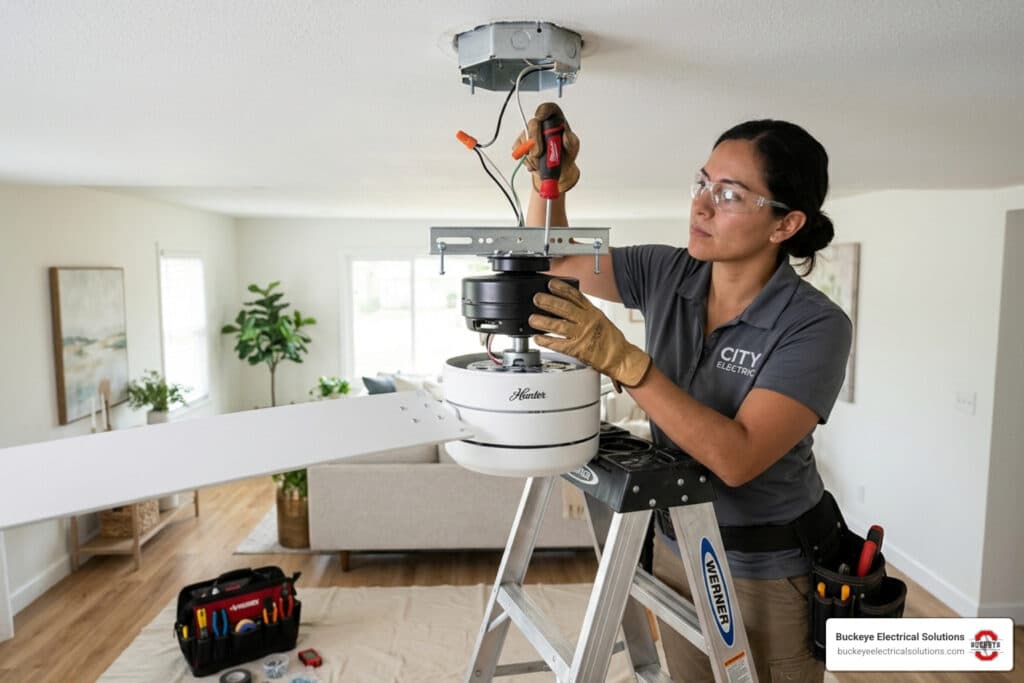
| 5. Mount the bracket | Attach the fan’s mounting bracket to the rated box with the correct hardware |
| 6. Connect the wiring | Match wire colors, use new wire nuts, and tuck wires neatly into the box |
| 7. Test | Restore power and check for wobble, noise, or loose connections |
A standard plastic light fixture box is often not built for this job, depending on the AHJ. Using one is a common mistake that can often lead to a fan coming loose — sometimes creating a safety hazard.
I’m Aaron, owner and master electrician at Buckeye Electrical Solutions LLC, and I’ve handled dozens of residential electrical projects across Northeast Ohio — including plenty of jobs where attaching a ceiling fan to an electrical box was done incorrectly the first time and needed to be fixed safely and up to code. In this guide, I’ll walk you through how it is typically done right.
Common attaching ceiling fan to electrical box vocab:
Identifying a Fan-Rated Electrical Box
Before you even think about lifting that motor assembly, we have to talk about the box. In our 20 years of experience serving Northeast Ohio, we’ve often seen fans hanging precariously because they were mounted to a box typically meant for a lightweight LED globe.
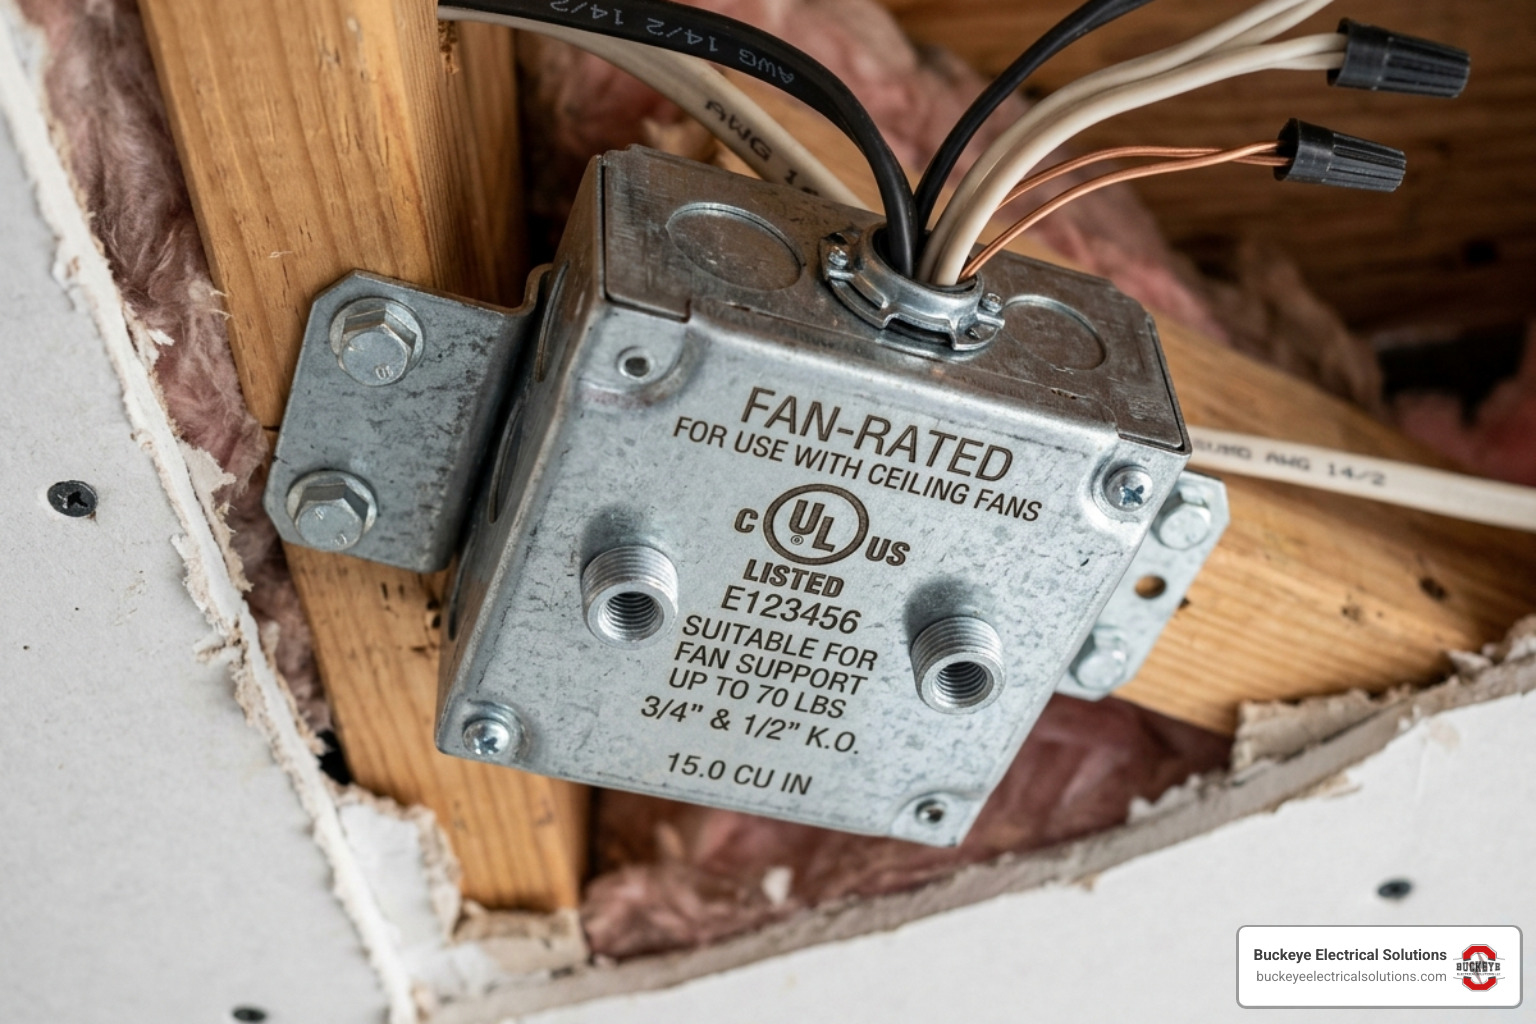
A fan-rated electrical box is a specialized piece of hardware. While a standard light fixture box is designed to hold a static weight, a fan-rated box is typically engineered to handle a dynamic load. This means it can often support the weight of the fan (which can be as much as 50 pounds, depending on the model) while it is in motion. The vibrations and torque generated by a spinning fan create stress that could potentially cause a standard box to fail over time.
According to How to Install a Ceiling Fan Electrical Box, these boxes are often made of heavier gauge metal or high-strength reinforced plastic to meet UL-listing requirements.
Signs Your Box is Rated for Ceiling Fans
If you are looking at an existing box in your ceiling, here is how you can typically tell if it is safe for attaching a ceiling fan to an electrical box:
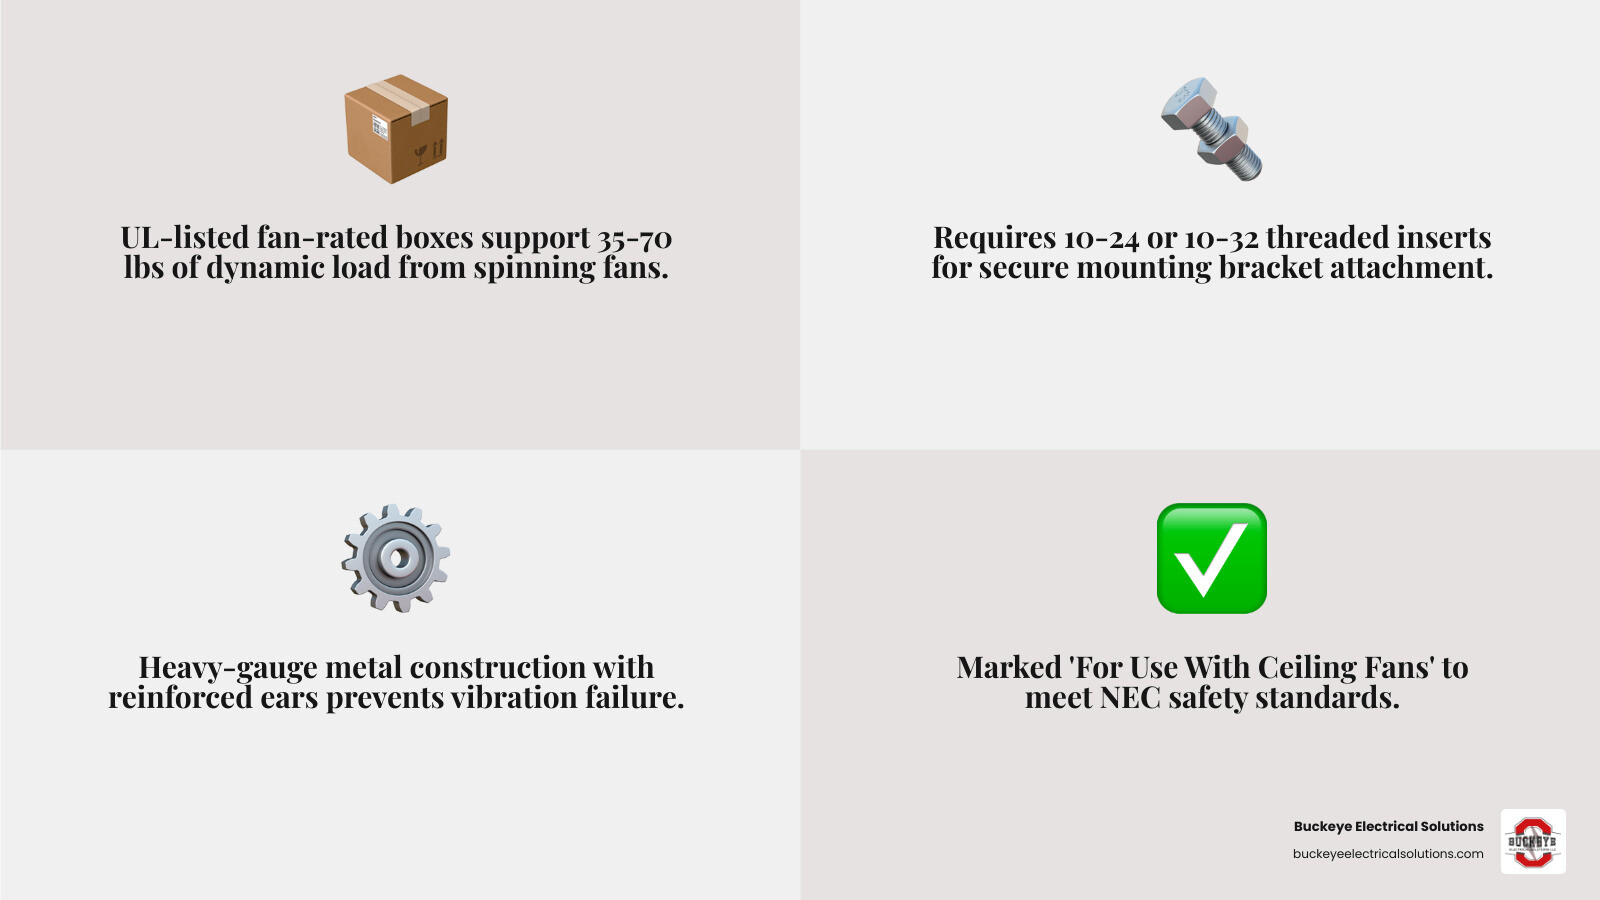
- The Labeling: Look inside the box. You should typically see a stamped or printed label that says “UL Listed” and “For Use With Ceiling Fans.” It might also list a weight capacity, often between 35 and 70 pounds.
- Threaded Inserts: Fan-rated boxes often have deep, robust threaded inserts or integrated nuts.
- Heavy-Gauge Material: These boxes often feel substantial. If it’s metal, it will typically be thicker than a standard “handy box.”
- Reinforced Ears: The “ears” (the parts the screws go into) are often part of the box’s structural frame or are reinforced to help prevent them from snapping under the weight of a moving fan.
Why 8-32 Screws are Often Insufficient for Attaching Ceiling Fan to Electrical Box
This is a technical detail that typically enhances safety and helps prevent damage to your home. Standard light fixture boxes typically use 8-32 screws. These are relatively thin and may lack the shear strength required to hold a vibrating motor, depending on the fan’s weight.
Fan-rated boxes typically require 10-24 or 10-32 screws. These are thicker, have more “bite,” and offer significantly higher resistance to the vibrations that naturally occur when a fan is running. If you try to force a 10-24 screw into an 8-32 hole, you’ll likely strip the threads. If you use an 8-32 screw in a fan box, it typically won’t be secure. It is often best to use the hardware specifically provided with the fan-rated box or the fan itself.
Step-by-Step: Attaching Ceiling Fan to Electrical Box
Ready to get to work? Safety is a priority at Buckeye Electrical Solutions. Before you grab your screwdriver, ensure the power is typically verified as off at the breaker panel.
Preparing the Mounting Bracket and Hardware
The mounting bracket is the bridge between your fan and the electrical box. For a successful install, the bracket should typically sit flush against the ceiling surface. If the box is recessed too deeply, the bracket might bend when you tighten the screws, potentially leading to a wobbly fan later.
- Alignment: Hold the bracket up to the box. The slots in the bracket should typically align with the 10-24 threaded holes in the box.
- Hardware Check: Use the hex head screws or heavy-duty machine screws typically provided with your fan-rated box.
- Washers: It is typically recommended to use lock washers. These are the little “toothed” or split washers that help prevent the screws from backing out due to vibration.
For more on the assembly process, check out our guide on Mastering Ceiling Fan Installation A Homeowners Handbook.
Securing the Bracket to the Fan-Rated Box
When attaching a ceiling fan to an electrical box, it is often best to aim for a “snug fit” rather than over-tightening. Overtightening can often strip the threads or crack the box if it’s plastic.
- Metal-to-Metal Contact: Ensure the bracket is seated firmly against the box or the ceiling surface.
- Grounding: The green or bare copper wire from your home’s circuit should typically be securely attached to the grounding screw inside the box or the grounding lead on the bracket.
- Vibration Dampening: Some brackets come with rubber gaskets or pads. Ensure these are positioned correctly to help minimize noise during operation.
According to This Old House, ensuring this connection is secure is typically considered a critical step in preventing the dreaded “ceiling fan hum.”
Structural Support and Mounting Options
A fan-rated box is typically only as good as what it’s attached to. Screwing a box into drywall alone is typically not sufficient and could lead to failure.
Direct Joist Attachment vs. Expandable Braces
In Ohio homes, we typically see two main ways to secure a fan box, depending on the AHJ:
- Direct Joist Attachment: If your fan is positioned directly under a wood joist, you can often use a “pancake box” or a “saddle box.” These are typically screwed into the timber using 2-inch wood screws (it is typically advised to avoid drywall screws, as they can be brittle and may snap under load).
- Expandable Braces (Saf-T-Brace): If the fan needs to be between joists, an expandable metal brace is often used. You insert the brace through the hole in the ceiling, rotate it until the spiked ends dig into the joists, and then tighten it with a wrench. The electrical box then typically hangs from this brace using a U-bolt.
| Mounting Method | Best For… | Key Hardware |
|---|---|---|
| Direct Joist | Fan located exactly on a beam | 2″ Wood Screws |
| Expandable Brace | Fan located between joists | U-bolt & Locking Nuts |
| Saddle Box | New construction / Attic access | Integrated bracket |
Proper Depth for Attaching Ceiling Fan to Electrical Box
The depth of your box typically matters for both aesthetics and code compliance. Per the National Electrical Code (NEC) and Ohio building standards, the edge of the electrical box should typically be flush with the finished ceiling surface.
If you are using a “pancake box,” ensure it doesn’t protrude past the drywall. If the box is too deep, you may need a box extender to ensure your wiring is properly contained.
Wiring and Final Safety Checks
Once the box is up and the bracket is secure, it’s time for the wiring phase, which typically requires careful attention.
Handling Connections Inside the Box
Modern fans often have a lot of wires, especially if they include a light kit and a remote receiver.
- Color Coding: Typically, it’s black to black (power), white to white (neutral), and green or bare copper to ground. If you have a red wire in your ceiling, that often indicates a second switched leg for the light.
- Wire Tucking: This is a step where many people may encounter challenges. Use quality wire nuts and ensure no bare copper is showing. Fold the wires neatly into the box, typically keeping the neutrals on one side and the hot wires on the other to prevent crowding.
- Remote Receivers: If your fan has a remote, the receiver usually slides into the mounting bracket. Make sure it doesn’t pinch any wires against the attaching ceiling fan to electrical box hardware.
For more details on the final assembly, see Dont Get Hung Up A Simple Guide To Ceiling Fan Downrod Installation.
Testing for Stability and Balance
Before you put the ladder away, perform a function test.
- The Wobble Test: Run the fan on high. If it shakes, check that the mounting bracket screws are tight. If they are, you may need a balancing kit to level the blades.
- The Noise Check: Listen for clicks or hums. This often means a wire is touching the inside of the canopy or a screw is slightly loose.
- Efficiency: A well-balanced fan typically runs more efficiently and puts less strain on the motor, potentially saving you money on energy bills over time.
Frequently Asked Questions about Ceiling Fan Boxes
Can I use a standard plastic light fixture box for a ceiling fan?
Typically, no. Standard plastic boxes are often designed for static loads and may lack the structural reinforcement to handle the weight and constant vibration of a spinning fan. Using one can often lead to the box cracking or the screws pulling through the plastic, potentially causing the fan to fall.
How much weight can a typical fan-rated box support?
Most UL-listed fan-rated boxes are designed to support fans weighing between 35 and 70 pounds. However, it is typically best to check the specific rating stamped inside the box, as some heavy-duty models can support even more, while smaller “pancake” boxes might have lower limits.
What should I do if my existing box is not fan-rated?
If your box isn’t fan-rated, it should typically be replaced. In Ohio, building codes often require a fan-rated box for any ceiling fan installation. You can typically swap it out for an expandable brace and a new box without needing to tear down your drywall, though attic access often makes the job easier.
Conclusion
Attaching a ceiling fan to an electrical box is a project that can often improve the comfort and style of your home. However, because it involves both structural integrity and electrical safety, it’s a job that should typically be done correctly, depending on the AHJ. From identifying the right UL-listed box to ensuring it’s anchored to a joist with 10-24 screws, every detail typically matters.
If you’re in Northeast Ohio and feel unsure about the wiring, or if you’ve discovered that your ceiling lacks the proper support for a new fan, we’re here to help. At Buckeye Electrical Solutions, we bring over 20 years of expertise to every home, ensuring your installations are safe, silent, and up to code.
Ready to upgrade your home’s comfort? Contact Buckeye Electrical Solutions today for professional residential electrical services.