What You Need to Know Before Tackling Spot Light Wiring
Spot light wiring is one of those jobs that looks simple on the surface — but get it wrong and you’re dealing with blown fuses, damaged switches, or worse, an electrical fire.
Here’s the quick answer most people are looking for:
How to wire spotlights safely (at a glance):
- Disconnect the negative battery terminal before you start
- Use an automotive relay — never wire spotlights directly through a standard switch
- Run a dedicated fused wire from the battery or starter motor to the relay
- Trigger the relay from your high beam or ignition circuit
- Ground all components to a solid chassis point using ring terminals
- Protect all connections with heat shrink or electrical tape and use waterproof switches
Whether you’re wiring auxiliary lights on a truck, a classic car, or adding outdoor spotlights to your home, the fundamentals of safe wiring don’t change — proper protection, proper grounding, proper sizing.
There’s a lot more nuance once you get into vehicle-specific harnesses, wire gauge selection, fuse ratings, and Ohio electrical code compliance for outdoor residential spotlights. That’s what this guide covers in full.
I’m Aaron, a master electrician and owner of Buckeye Electrical Solutions LLC — I’ve directed more than 60 permitted electrical projects across Northeast Ohio, and spot light wiring is one of the most common areas where I see DIYers run into avoidable problems. Let’s make sure you’re not one of them.

Quick look at spot light wiring:
The Fundamentals of Safe Spot Light Wiring
When it comes to auxiliary automotive lighting, safety must be your top priority. Spotlights draw a significant amount of electrical current, especially if you are using high-wattage halogen bulbs. If you try to run all of that current directly through a basic dashboard switch, the switch will overheat, melt, and potentially spark a fire.
We always recommend utilizing a dedicated wiring path that isolates high-current loads from your control switches. If you ever run into damaged or degraded wires during an upgrade, understanding The Ultimate Guide to Repairing Broken and Cut Electrical Wires is key to restoring safe connections.
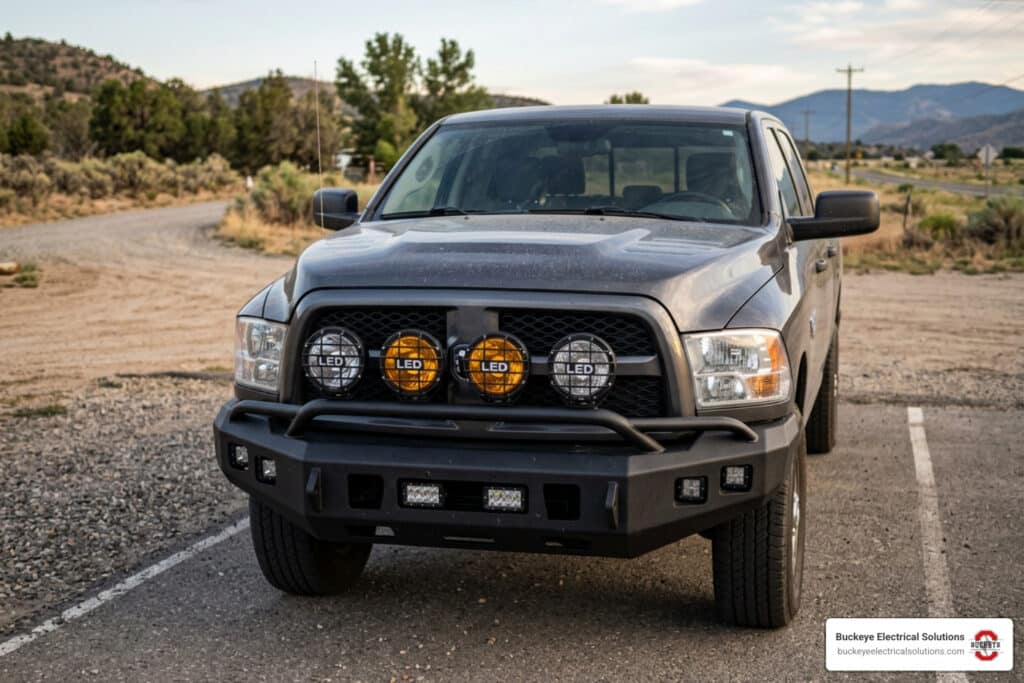
Why You Must Use an Automotive Relay
An automotive relay—specifically a Single Pole Single Throw (SPST) 4-pin or 5-pin relay rated for at least 30 to 40 amps—is the unsung hero of vehicle electronics.
A relay acts as an electromagnetic switch. It allows a tiny, low-current signal (like a toggle switch on your dash or a tap into your high beam circuit) to control a massive, high-current flow directly from your battery to your spotlights. This design offers several critical advantages:
- Switch Protection: Your dashboard switch only handles milliamps of current to trigger the relay’s internal coil, protecting it from melting.
- Voltage Drop Prevention: By running heavy-gauge wire directly from the power source to the lights through the relay, you minimize resistance. This ensures your spotlights receive maximum voltage and shine at their full rated brightness.
- Cleaner Cabin Wiring: You do not have to route thick, dangerous, high-current power wires through your firewall and dashboard.
Selecting the Right Wire Gauge and Fuse for Spot Light Wiring
To prevent your wires from turning into heating elements, you must size your wire gauge and fuses to handle at least 125% of the circuit’s maximum current capacity.
To calculate your current draw (amperage), use the classic power formula: $$\text{Amps} = \frac{\text{Total Watts}}{\text{Volts}}$$
For example, if you are installing two 55-watt halogen spotlights on a standard 12-volt vehicle system: $$\text{Amps} = \frac{110\text{ W}}{12\text{ V}} \approx 9.16\text{ Amps}$$
For a ~9.16-amp draw, a 15-amp fuse paired with 14 AWG copper wire is sufficient. However, if you are running heavy-duty light bars or multiple high-output halogen lamps drawing up to 20 or 30 amps, you must upgrade to 12 AWG or even 10 AWG wire with a corresponding 30-amp inline fuse.
Always install the inline fuse holder as close to the battery terminal or starter motor connection as possible (ideally within 12 inches) to protect the entire length of the wire. For those looking to build their foundational electrical knowledge, check out Power Up Your Knowledge A Beginners Guide to Home Wiring to understand how wire gauges and circuit protection work in both automotive and residential settings.
Step-by-Step Guide to Wiring Vehicle Spotlights
Ready to roll up your sleeves? Follow this step-by-step procedure to wire your vehicle’s auxiliary spotlights safely and professionally.
- Disconnect the Battery: Safety first. Always disconnect the negative (-) battery terminal before touching any electrical components.
- Mount the Spotlights: Securely mount your lights to your bumper, bull bar, or roof rack.
- Mount the Relay: Find a dry, secure location in the engine bay away from extreme heat sources like the exhaust manifold. Mount the relay upright so water cannot pool inside the casing.
- Route the Harness: Lay out your wiring harness. Route the thick power wires from the battery to the relay, and from the relay to the spotlights.
- Pass Through the Firewall: Route your thin switch-trigger wires into the cabin. Always use a rubber grommet when passing through metal firewalls to prevent the sharp metal edges from chafing and cutting the wire insulation over time.

Integrating with Existing High Beams and Switches
Many drivers prefer their auxiliary spotlights to turn on automatically with their high beams. This is highly recommended because it allows you to instantly kill all high-intensity forward lighting with a single flick of your factory steering column switch when oncoming traffic appears.
To integrate your spotlights with your high beams:
- Locate your vehicle’s factory headlight harness.
- Identify the high beam trigger wire (for classic Minis, this is typically the blue/white wire behind the grille).
- Connect a tap wire from this high beam circuit to terminal 86 on your relay.
- Route terminal 85 on your relay to your cabin switch, and then ground the switch to the chassis.
When your factory high beams are activated, power flows to terminal 86, and when you flip your cabin switch “on,” the relay coil energizes, completing the circuit and illuminating your spotlights. This setup ensures full compliance with Ohio Revised Code Section 4513.12, which outlines specific regulations for auxiliary driving lights.
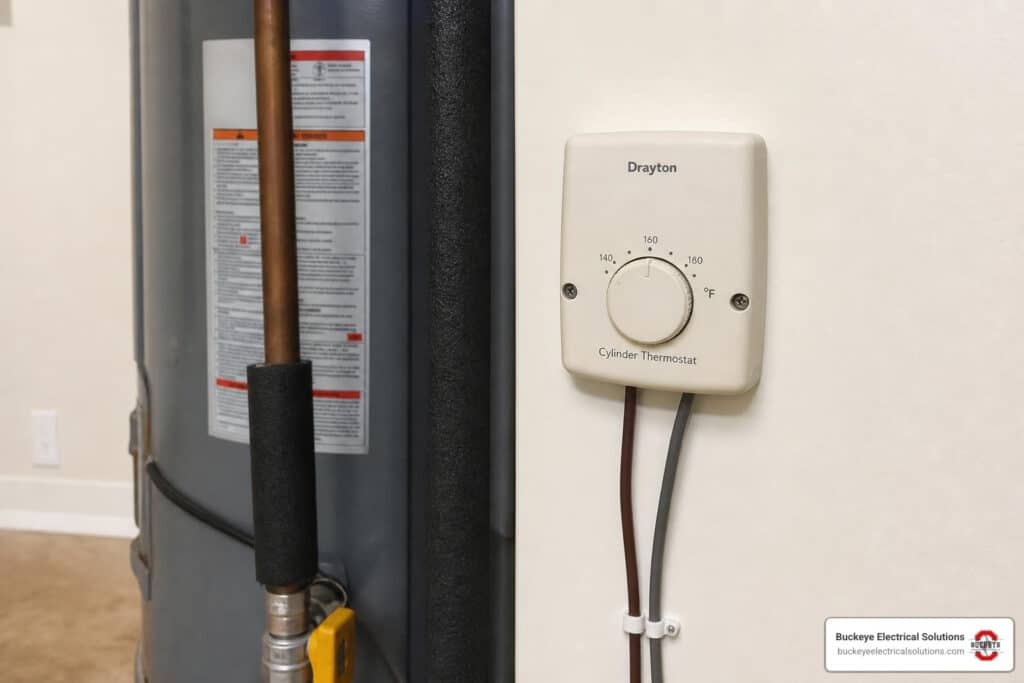
Grounding and Weatherproofing Your Spot Light Wiring
A circuit is only as good as its ground. Poor grounding is the number one cause of flickering lights and mysterious voltage drops.
- Chassis Grounding: Always scrape away paint, rust, or dirt to bare metal before securing your ground wires. Use copper-coated ring terminals and self-tapping screws or existing factory ground bolts on the inner fender or frame.
- Weatherproofing: Auxiliary lights face harsh outdoor environments. Use waterproof, illuminated rocker switches (such as DrySeal marine-grade switches) for any exposed controls on UTVs or motorcycles.
- Sealing Connections: Protect all splices with adhesive-lined heat shrink tubing rather than cheap electrical tape. This prevents moisture intrusion, which can lead to rapid corrosion and circuit failure.
Vehicle-Specific Considerations and Harness Differences
Wiring harness kits are not one-size-fits-all. A kit designed for a closed-cab pickup truck will have different lengths, switch configurations, and weatherproofing requirements than a kit meant for a motorcycle, UTV, or classic car.

- Motorcycles: Require compact, highly waterproof harnesses with integrated handlebar-mounted switches. Vibrations are intense on motorcycles, so robust, locked connectors are essential.
- UTVs & Side-by-Sides: These vehicles are frequently exposed to mud and deep water. Look for IP67 or IP68 rated harnesses with sealed relays and specialized power distribution blocks.
- Trucks & SUVs: Feature longer wire runs and often integrate with multi-switch panels mounted inside the cabin.
Classic Cars vs. Modern Trucks: Tacoma, MGB, and Mini
If you are working on a specific vehicle model, keep these critical compatibility and engineering differences in mind:
Toyota Tacoma
Modern Tacomas feature specific dash blank dimensions. When adding auxiliary lights, look for specialized kits like the Wsays 3-Lead Wiring Harness kit, which features a dual LED light bar and spotlight switch designed to fit the factory 1.52″ x 0.82″ (33mm x 22mm) dash surface size.
Note: While this kit boasts a 4.2 out of 5-star rating from global reviews, with 75% of users giving it 5 stars, roughly 25% of reviewers rate it 2 stars due to incorrect size compatibility issues. Always measure your specific dash blank before purchasing.
MGB and Classic British Sports Cars
Classic MGBs have notoriously delicate electrical systems. Their lighting circuits are entirely unfused and route directly through the steering column switches. Adding high-draw spotlights directly to these circuits will melt your vintage switches. You must install a relay system along the inner wing to protect your factory components.
Classic Mini
A standard classic Mini is equipped with a modest 45-amp alternator. If you install four traditional 55-watt halogen spotlights, they will draw roughly 35 amps combined. This leaves almost no headroom for your ignition system, wipers, heater, and battery charging, which will quickly drain your battery. When fitting four spotlights, upgrading to a 70-amp alternator is highly recommended to handle the load safely.
Residential and Outdoor Spotlight Wiring Standards
While automotive spotlights are powered by 12V DC systems, residential outdoor security and architectural spotlights run on 120V AC utility power. The stakes are much higher here, as improper wiring can result in lethal electrical shocks.
For home installations, you must use a minimum of 14 AWG (for 15-amp circuits) or 12 AWG (for 20-amp circuits) 3-core outdoor-rated cable (such as UF-B cable). All outdoor connections must be made inside a UL-listed weatherproof electrical junction box, sealed with a foam backing and a bead of high-quality silicone caulk.
If you are installing smart home security lights, refer to the Hardwired Kit Setup Guide for Spotlight Cam Plus and Spotlight Cam Pro (US/NA) to ensure your mounting brackets and connections are fully weatherproofed. To learn more about standard home wiring rules, dive into The NEC Book Bible.
Ohio NEC Compliance and GFCI Requirements
When installing outdoor residential spotlights in Northeast Ohio, you must adhere strictly to the National Electrical Code (NEC).
Important Code Note: Ohio’s 2023 NEC adoption includes expanded GFCI (Ground Fault Circuit Interrupter) requirements in several locations, qualifying specific rules (like those for kitchens) as situational rather than universal.
For outdoor spotlight installations:
- Any outdoor electrical outlet or lighting circuit installed in wet or damp locations must feature GFCI protection to prevent shocks in rainy conditions.
- All outdoor light fixtures must be marked “Suitable for Wet Locations.”
- Conduit must be used to protect any exposed wiring running down exterior walls.
Troubleshooting Common Spotlight Wiring Issues
If you’ve flipped the switch and your spotlights refuse to shine, don’t panic. Most issues boil down to simple connection errors or blown fuses. Having a solid understanding of diagnostic tools is incredibly helpful here; you can brush up on your skills with The Ultimate Guide to Electrical Testers What They Are and How to Use Them.
Common Faults and Priority Levels
Use this reference table to diagnose and resolve your spotlight wiring issues:
| Fault | Likely Causes | Priority Level |
|---|---|---|
| Spotlights do not turn on at all | Blown inline fuse; loose ground wire; incorrect relay pin connections; or Outlet has no voltage; could indicate breaker, GFCI, switch, or wiring issue. | High |
| Lights are extremely dim or flicker | Excessive voltage drop due to thin wire gauge; loose or corroded chassis ground; improper wiring. | Medium |
| Switch melts or gets hot to the touch | Spotlights wired directly to the switch without a relay; overloaded switch contacts. | Urgent |
| Battery drains overnight | Switch or relay wired to a constant 12V battery source instead of an ignition-switched circuit. | Medium |
Frequently Asked Questions about Spotlight Installation
Can I wire spotlights directly to the battery without a relay?
Technically, yes, but it is highly dangerous and not recommended. Direct wiring forces the full current load of the lights through your dashboard switch. This can cause the switch to overheat, fail, or melt your wires, creating a major safety hazard. Always use a relay to keep high current out of your passenger cabin.
How do I prevent my auxiliary spotlights from draining the battery?
To prevent accidental battery drain, wire the trigger wire of your relay (terminal 86) to an ignition-switched power source (like your accessory outlet or dash illumination circuit) rather than directly to the battery. This ensures the spotlights can only turn on when the vehicle’s engine is running. Upgrading to modern LED spotlights also significantly reduces current draw compared to old-school halogens.
What are the legal requirements for using spotlights in Ohio?
According to Ohio Revised Code, auxiliary driving lights and spotlights must be aimed so that high-intensity light beams do not project directly into the eyes of oncoming drivers. They are intended for off-road or rural use and must be switched off when approaching other vehicles. Check local municipal guidelines in Northeast Ohio for specific mounting height restrictions.
Conclusion
Wiring spotlights like a professional requires patience, the right materials, and a commitment to safety. Whether you are upgrading your truck for off-road adventures, restoring a classic car, or securing your home with outdoor security lighting, taking the time to install relays, inline fuses, and proper grounds will pay off in long-term reliability.
If you are uncomfortable handling automotive or residential electrical work yourself, let the experts take care of it. Buckeye Electrical Solutions is a trusted electrical contractor in Northeast Ohio. With over 20 years’ experience, we provide quality residential and commercial electrical repair, installation, and maintenance, known for exceptional service and prompt project completion.
All of our service pricing and estimates are subject to change and dependent on local site conditions or local Authority Having Jurisdiction (AHJ) requirements. Contact us today to schedule your professional electrical services and let us bring some “bright ideas” to your next project!