Why Safe Outlet Installation Matters for Your Home
Outlet installation is a common project for homeowners, from replacing a worn-out receptacle to adding a new one for a home office. While replacing an outlet is often straightforward, adding a new one requires careful planning and knowledge of electrical codes.
Quick Answer: What You Need to Know About Outlet Installation
- Replacing an outlet: Turn off power → Remove old outlet → Connect wires (ground/neutral/hot) → Secure new outlet → Test
- Adding a new outlet: Plan location → Cut opening → Run new cable → Install box → Wire outlet → Test
- Always required: Turn off power at breaker, use voltage tester, follow color codes (black=hot, white=neutral, green=ground)
- GFCI outlets required: Kitchens, bathrooms, garages, laundry rooms, and outdoor locations
- When to call a pro: New circuits, main panel work, aluminum wiring, or any time you feel uncertain
Why This Matters
Electrical issues cause around 51,400 home fires per year in the U.S., with 75% of these fires stemming from faulty wiring or equipment. A properly installed outlet protects your family, home, and appliances.
With the right knowledge, many outlet projects are manageable for confident DIYers. The key is knowing when a project is within your skill level and when it’s time to bring in a licensed professional.
I’m Aaron, and I’ve overseen dozens of outlet installation projects across Northeast Ohio. In this guide, I’ll walk you through everything you need to know to install outlets safely and correctly.
 Always turn off power at the breaker and test with a voltage tester before touching any wires, 2) Match wire colors correctly - black to brass screws, white to silver screws, green or bare copper to green ground screw, 3) Use GFCI outlets in any location near water including kitchens, bathrooms, garages, and outdoor areas - outlet installation infographic pillar-3-steps")
Pre-Installation Checklist: Safety, Tools, and Wire Identification
Before touching a wire, let’s talk safety. Working with electricity isn’t like assembling furniture—serious risks are involved. At Buckeye Electrical Solutions, safety is our top priority for our team and customers in Northeast Ohio.
Essential Safety Precautions
Working with electricity demands respect. Follow these strict safety rules before any outlet installation:
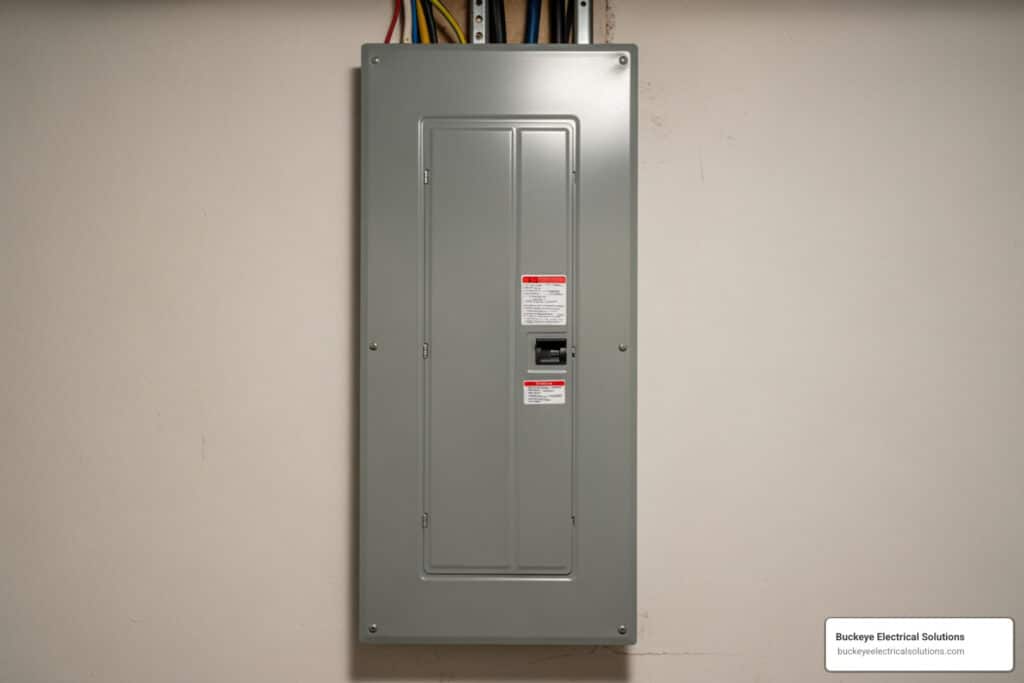
- Turn Off the Power: This is non-negotiable. Go to your main electrical panel and flip the correct circuit breaker to “OFF.” If you’re unsure which breaker it is, turn off the main breaker for the entire house.
- Verify Power is Off: Don’t trust the breaker switch. Use a non-contact voltage tester on the outlet slots. If it beeps or lights up, power is still on. Test your tester on a known live outlet first to ensure it works.
- Label the Breaker: Tape a note over the breaker switch that says “DO NOT TOUCH – ELECTRICAL WORK IN PROGRESS” to prevent someone from accidentally restoring power.
- Wear Personal Protective Equipment (PPE): Insulated gloves and safety glasses are crucial for protection against shocks and debris.
- Ensure a Dry Work Area: Water and electricity are a dangerous mix. Make sure your hands, feet, and the floor are completely dry.
- Understand Electrical Safety Standards: Adhering to standards like those from OSHA is crucial. Learn more at Electrical safety standards.
Identifying Your Wires Correctly
Once the power is off, you’ll see three types of wires inside the electrical box:

- Hot Wire (Black): Carries current from the power source. It’s usually black and connects to the brass-colored screw terminals.
- Neutral Wire (White): Carries current back to the power source to complete the circuit. It’s always white and connects to the silver-colored screw terminals.
- Ground Wire (Green or Bare Copper): Your safety net. It provides a safe path for electricity during a fault. It’s green or bare copper and connects to the green hexagonal screw terminal.
Before disconnecting wires, take a clear photo with your phone as a reference. If you’re unsure about your breaker box, a quick YouTube search for What’s in My Breaker Box can help.
Tools and Materials Needed for Outlet Installation:
- Non-contact voltage tester
- Phillips and flathead screwdrivers
- Wire strippers/cutters
- Needle-nose pliers
- New outlet receptacle (standard, GFCI, etc.)
- New faceplate
- Electrical tape
- Work light
- Drywall saw (for new installation)
- “Old work” electrical box (for new installation)
- Electrical cable and wire connectors (for new installation)
Signs of a Faulty Outlet:
Watch for these red flags that indicate an outlet needs replacement:
- Sparks: Seeing sparks when plugging or unplugging a device is a serious problem.
- Loose Plugs: If plugs fall out, the outlet’s internal contacts are worn, creating a fire hazard.
- Scorch Marks or Heat: Brown marks or an outlet that’s hot to the touch indicates overheating.
- Flickering Lights: Could point to a loose connection in the outlet or circuit.
- Outlet Lifespan: Standard outlets last 5-15 years with frequent use, while GFCI outlets last 15-25 years. Replace any outlet showing signs of failure, regardless of age.
How to Replace an Existing Electrical Outlet: A Step-by-Step Guide
Replacing an existing outlet is a manageable DIY task for many homeowners in Northeast Ohio, as the wiring is already in place. It’s a quick upgrade for safety or aesthetics.
Step-by-Step Guide for a Basic Outlet Installation
Follow these steps to swap out an old outlet. Safety first!
- Turn Off the Power: Go to your electrical panel, flip the correct breaker, and confirm the power is off with your voltage tester.
- Remove the Faceplate: Use a screwdriver to remove the cover plate.
- Unscrew and Pull Out the Old Outlet: Unscrew the two mounting screws holding the outlet to the box, then carefully pull it out.
- Disconnect the Wires: Loosen the screw terminals and unhook each wire. Remember the order: ground (green/bare), neutral (white), then hot (black).
- Prepare the New Outlet: We recommend using the side screw terminals, not the “push-in” connectors. Strip about 1/2 to 3/4 inch of insulation from each wire and bend the ends into a small hook.
- Connect the Wires to the New Outlet:
- Ground Wire First: Attach the green or bare copper wire to the green hexagonal screw.
- Neutral (White) Wire: Connect the white wire to a silver screw terminal.
- Hot (Black) Wire: Connect the black wire to a brass screw terminal.
- Wrap all hooks clockwise around the screws and tighten securely. For more visuals, see this guide on How to Replace an Outlet │ Legrand.
- Fold Wires into the Box: Gently push the wired outlet back into the box, folding the wires behind it without sharp bends.
- Secure the New Outlet: Screw the outlet to the electrical box, ensuring it’s straight.
- Attach the Faceplate: Screw on the new cover plate.
- Restore Power and Test: Go back to the panel, remove your note, and flip the breaker back to “ON.”
How to Test Your New Outlet
It’s crucial to test your new outlet installation.
- Using a Plug-in Receptacle Tester: This inexpensive tool is a must-have. Plug it in; its lights will indicate if the wiring is correct (e.g., proper ground, no reversed polarity). A reading between 110 to 120 volts signals it’s working correctly.
- Testing GFCI Buttons (if applicable): If you installed a GFCI, press the “TEST” button. The “RESET” button should pop out, cutting power. Press “RESET” to restore power. This confirms the safety feature works. We recommend testing GFCIs monthly.
How to Add a New Outlet: A Guide to New Outlet Installation
Adding a new electrical outlet is more complex than a simple replacement, as it requires running new wire and understanding your home’s electrical load. It’s like minor surgery on your home’s electrical system.
| Feature | Replacing an Outlet | Adding a New Outlet |
|---|---|---|
| Complexity | Low to moderate | Moderate to high |
| Time | 15-30 minutes (DIY) | 30 minutes to several hours (DIY), potentially longer for professionals |
| Cost | Low (cost of new outlet, ~ $10-$30) | Moderate (cost of outlet, box, wire, tools, potentially permit fees) |
| Risks | Primarily shock from improper power cutoff/wiring | Shock, fire, circuit overload, code violations |
| Wiring Involved | Disconnecting/reconnecting existing wires | Running new wires from an existing circuit or the electrical panel |
| Tools Needed | Screwdrivers, voltage tester, wire strippers | All replacement tools, plus drywall saw, fish tape, stud finder |
| Professional? | DIY-friendly for most | Often recommended due to complexity and safety concerns |
Key Considerations for Your Outlet Installation Project
Before cutting into a wall, consider these factors for a new outlet installation:
- Electrical Load and Circuit Capacity: Every circuit has a power limit. Adding an outlet can overload it, leading to tripped breakers or fire hazards. Understanding your home’s electrical load is essential.
- National Electrical Code (NEC) and Local Building Codes: Electrical work is governed by strict safety codes. In Northeast Ohio, our work must comply with the NEC and local rules, which dictate everything from outlet spacing to required types. For example, 24 CFR § 3280.806 – Receptacle outlets. provides detailed requirements.
- Permits: Depending on your Ohio jurisdiction and the scope of work, you may need an electrical permit to ensure the work is inspected and meets safety standards.
- Wall Material: Drywall, plaster, or concrete walls will influence the tools and techniques needed.
Step-by-Step Instructions for Adding a New Outlet
If you’re confident in your skills, here’s a general outline. When in doubt, call a professional.
- Plan Your Location: Choose a convenient spot for the new outlet. Use a stud finder to locate and avoid studs if using an “old work” box, which clamps to the drywall.
- Turn Off Power to the Circuit: Safety first! Turn off the breaker for the circuit you’re tapping into and verify with a voltage tester.
- Cut the Opening for the New Box: Trace the outline of your “old work” box on the wall and carefully cut the opening with a drywall saw.
- Run New Electrical Cable: This is often the trickiest part. Run new cable from a power source (like an existing outlet) to the new location. This may involve drilling through studs or using fish tape to guide the wire. Leave 6-8 inches of wire extending from each box. For tips on connecting wires, this resource on How Do I Connect Two Wires? might be helpful.
- Install the “Old Work” Electrical Box: Feed the cable into the new box, insert the box into the wall, and tighten the screws to clamp it securely to the drywall.
- Connect Wires to the New Outlet: Strip the wires and create hooks. Connect the ground (green/bare) wire to the green screw, the neutral (white) wire to a silver screw, and the hot (black) wire to a brass screw. If tapping into an existing outlet, use pigtails and wire nuts to ensure continuous power to downstream outlets.
- Mount the Outlet and Test: Gently push the wired outlet into the box, secure it, and attach the faceplate. Restore power and test the new outlet with a receptacle tester.
Special Outlets and Locations: GFCI, USB, and Kitchen/Bathroom Rules
Not all outlets are the same. Specialized outlets offer improved safety and convenience, and certain areas of your home have specific outlet installation requirements.
What is a GFCI Outlet and Why is it Important?
The GFCI (Ground Fault Circuit Interrupter) is a critical safety device that protects you from electrical shock.
- How it Works: A GFCI constantly monitors electrical current. If it detects an imbalance (a “ground fault,” often caused by water), it trips and shuts off power in a fraction of a second, preventing serious injury.
- Why it’s Important: GFCI outlets are mandatory in any area where water and electricity might mix, including:
- Kitchens (for all countertop outlets and near sinks)
- Bathrooms
- Garages and unfinished basements
- Laundry rooms
- Outdoors
- Line vs. Load Terminals: When installing a GFCI, the “LINE” terminals are for incoming power. The “LOAD” terminals can be used to protect other standard outlets downstream on the same circuit.
- Monthly Testing: GFCI outlets can last 15-25 years, but they should be tested monthly by pressing the “TEST” button to ensure the safety feature is working.
Modern Outlet Types and Their Benefits
Modern outlets offer convenient upgrades for your home:
- USB Outlets: These have integrated USB ports (Type-A and Type-C) alongside traditional outlets, eliminating bulky adapters and charging devices up to 40% faster.
- Smart Outlets: Connect to your home’s Wi-Fi, allowing you to control devices remotely via a smartphone app or voice commands (Google Assistant, Amazon Alexa), improving convenience and energy efficiency.
- Tamper-Resistant Outlets (TRRs): A must-have for homes with children. TRRs have internal shutters that block foreign objects from being inserted, reducing shock risk. The National Fire Protection Association (NFPA) provides more info on
Tamper-Resistant Electrical Receptacles. - Nightlight Outlets: These have a built-in LED nightlight, perfect for hallways and bathrooms, providing a soft glow without using an outlet space.
- Rotating Outlets: These outlets swivel, making it easier to plug in multiple large adapters without blocking other sockets.
Costs, Timelines, and When to Call a Professional Electrician
While DIY outlet installation can save money, it’s crucial to weigh the risks against the benefits of professional expertise.
Typical Costs and Timeframes for Outlet Installation:
- DIY Replacement: The cost is mainly the new outlet ($10-$30). A confident DIYer can do this in 15-30 minutes.
- DIY New Installation: Materials might cost $30-$100. The time can range from 30 minutes to a few hours, depending on the complexity of running new wire.
- Professional Services: In Northeast Ohio, expect to pay between $120 and $300 per outlet. GFCI or USB outlets may cost slightly more. Most electricians have a minimum service fee or an hourly rate of $60 to $120 per hour.
- A professional can replace a single outlet in 5 to 20 minutes.
- Installing a new outlet with new wiring may take 20 to 60+ minutes per unit, with complex jobs taking longer.
When to Hire a Professional
Calling a licensed electrician is essential for your safety in certain situations. Don’t hesitate to contact us at Buckeye Electrical Solutions if you encounter any of the following:
- Complex Wiring: If you open a box and the wiring is confusing or doesn’t match standard color codes, call a pro.
- Aluminum Wiring: Older homes in Northeast Ohio may have aluminum wiring, which poses a fire hazard and requires specialized handling.
- Main Service Panel Work: Never work inside your main electrical panel unless you are a licensed electrician due to extreme risks.
- Adding a New Circuit: This involves working in the main panel and should always be done by a professional.
- Flickering Lights or Frequent Breaker Trips: These are signs of dangerous underlying issues that need professional diagnosis.
- Peace of Mind and Code Compliance: If you feel uncertain or want to ensure your outlet installation meets all codes, hiring a professional provides invaluable peace of mind. For complex projects in Northeast Ohio, Buckeye Electrical Solutions provides expert Residential Electrical Services.
Frequently Asked Questions about Electrical Outlets
Here are answers to common questions we get from homeowners in Northeast Ohio.
How long do electrical outlets last?
The lifespan depends on type and use:
- Standard Outlets: Typically last 5 to 15 years with frequent use. In rarely used areas, they might last up to 30 years. Wear and tear from regular plugging and unplugging shortens their life.
- GFCI Outlets: These have a lifespan of 15 to 25 years due to their complex internal safety mechanisms. Regular monthly testing is crucial to ensure they remain functional.
Regardless of age, replace any outlet that shows signs of failure, like loose plugs, scorch marks, or intermittent power.
What is the difference between a 15-amp and a 20-amp outlet?
The difference is the amount of current they can handle, which must match the circuit’s wiring and breaker:
- 15-Amp Outlets: The most common type, used on circuits with 14-gauge wire and a 15-amp breaker. They are suitable for general uses like lamps and computers.
- 20-Amp Outlets: Designed for circuits with thicker 12-gauge wire and a 20-amp breaker. You can identify one by the T-shaped slot on one of its openings. They are required for higher-power appliances, like those in kitchens or workshops.
Never install a 20-amp outlet on a 15-amp circuit, as this creates a fire hazard.
Can I install a GFCI outlet anywhere?
Yes, you can install a GFCI outlet in any room for extra shock protection, even if it’s not required.
However, GFCI outlets are required by code in Northeast Ohio in locations with a high risk of moisture. These mandatory locations include:
- Bathrooms
- Kitchens (especially serving countertops)
- Garages and unfinished basements
- Laundry rooms
- Outdoors
- Near wet bar sinks
A single GFCI can also protect other standard outlets “downstream” on the same circuit. When in doubt about code requirements, consult a licensed electrician.
Conclusion
We hope this extensive guide has demystified the process of outlet installation and replacement for your home in Northeast Ohio. From understanding the vital safety precautions to identifying different wire types and exploring modern outlet options, you’re now better equipped to tackle these projects.
While replacing a standard outlet can be a straightforward DIY task, adding a new outlet or dealing with complex wiring scenarios introduces higher risks and requires a deeper understanding of electrical systems and codes. Your safety and the integrity of your home’s electrical system are paramount.
When the project feels beyond your comfort level, or if you simply prefer the assurance of expert craftsmanship, don’t hesitate to call in the professionals. Our team at Buckeye Electrical Solutions is here to ensure all your electrical work is done safely, efficiently, and in full compliance with local codes. For all your electrical needs, from simple upgrades to complex installations, explore Our Services and let us light up your life with confidence.