
Why Upgrade to a Smart Light Switch?

Upgrading your home with installing smart light switch technology is an easier project than you might think. Here’s a quick overview:
- Most modern homes (built after the 1980s) have the necessary wiring.
- Basic tools required: voltage tester, screwdrivers, wire strippers, electrical tape.
- Installation time: 15-30 minutes per switch for someone comfortable with basic wiring.
- Key requirement: A neutral wire (white wire bundled in your electrical box).
- Safety first: Always turn off power at the circuit breaker and test with a voltage tester.
Unlike smart bulbs or plugs, smart switches provide complete, integrated control over your lighting. You can operate lights remotely via your phone, set schedules to make your home look occupied, or use voice commands with Alexa or Google Assistant to dim the lights for movie night.
The smart lighting market is projected to reach $25.7 billion by 2026. This growth is driven by real benefits: smart switches improve security by simulating occupancy, save energy by turning off forgotten lights, and work with standard LED bulbs, avoiding the cost of specialized smart bulbs. I’m Aaron, and I’ve seen how these systems can transform a home’s functionality and value. This guide will walk you through the process.

The Key Advantages
While smart bulbs and plugs have their place, smart light switches offer a more permanent and integrated solution.
Here’s why smart switches often come out on top:
- Cost-Efficiency in the Long Run: Smart bulbs are pricey and have a limited lifespan. Smart switches work with affordable, standard LED bulbs, offering significant long-term savings.
- Physical Switch Functionality: A major flaw of smart bulbs is that the physical wall switch must always be on. Smart switches replace the existing switch, ensuring both physical and smart controls always work, which is more user-friendly for everyone.
- Home Automation Integration: Smart switches are the backbone of an automated lighting system. They integrate with smart home ecosystems for complex scenes and schedules, like a “Goodnight” routine that turns off all house lights.
Choosing the Right Switch for Your Smart Light Switch Installation
Before grabbing your tools, it’s crucial to understand your existing setup.
The most important distinction is whether your light is controlled by a single-pole switch or a three-way (or multi-way) switch.
- Single-Pole Switch: This is the most common setup: one switch controls one light fixture. If a room has a single switch for the main light, it’s a single-pole switch. Most standard smart switches are designed for this.
- Three-Way Switch: This is when two switches in different locations (like each end of a hallway) control the same light. For this, you’ll need a master smart switch and a compatible “companion” or “remote” switch from the same brand.
- Multi-Way Switch: This is when three or more switches control the same light. The solution is similar to a three-way setup, requiring a master switch and multiple companion switches designed for multi-way use.
Beyond the number of switches, consider these factors:
- Dimmer Compatibility: If you want dimming, buy a smart dimmer switch and use it with dimmable bulbs to prevent flickering.
- Neutral Wire Requirement: Most smart switches need a neutral wire (usually white) in the electrical box to power their electronics. We’ll cover how to find this critical component shortly.
- No-Neutral-Wire Options: If your older home (common in Northeast Ohio) lacks a neutral wire, don’t worry. Some models, like the Lutron Caseta series, are designed to work without one, though they might cost more or require a hub.
Prep for Success: Tools and Pre-Installation Checks
Before diving into the wiring, proper preparation is key to a smooth and safe installing smart light switch experience.

Essential Tools and Materials
Here are the essential tools and materials you’ll need:
- Non-Contact Voltage Tester: Your most important safety tool.
- Philips Head Screwdriver: For removing wall plates and mounting screws.
- Flat Head Screwdriver: For prying off wall plates or for terminal screws.
- Wire Strippers/Cutters: For stripping and cutting wires.
- Pliers: To help manipulate wires in tight spaces.
- Electrical Tape: For labeling wires.
- Flashlight or Battery-Operated Lantern: Good lighting is crucial, even with the power off.
- Your New Smart Switch Kit: Ensure all components are present.
- Wire Nuts: Often included, but it’s good to have extras.
Understanding Your Home’s Wiring
This is the most critical part of the pre-installation process. Knowing your wires prevents confusion and ensures a safe installation.
-
What is a Neutral Wire?
The neutral wire (typically white) completes the electrical circuit. Most smart switches require it to stay powered on to receive commands (like from Wi-Fi or Bluetooth) even when the light is off. -
Finding the Neutral Wire
Inside your electrical box, look for a bundle of white wires, often capped together in the back. Your old mechanical switch may not have been connected to it. -
Ground Wire
The ground wire (bare copper or green) is a safety feature that prevents shocks in case of a fault. Always connect it. -
Line Wire (Hot)
The line wire (often black) brings constant power from your breaker panel to the switch. -
Load Wire
The load wire (also often black) carries power from the switch to the light fixture. -
Traveler Wires
Found only in three-way or multi-way setups, these wires (often red or black) carry power between the switches. -
Homes Built Before the 1980s: Older Home Considerations
Homes in Northeast Ohio built before the 1980s may have older wiring, such as no neutral wire or even aluminum wiring. Aluminum wiring requires special CO/ALR connectors to join with copper wires. If you find aluminum wiring or are unsure about your setup, we strongly recommend consulting a professional electrician for safety.
For more detailed visual guidance on identifying these wires, you can refer to resources like Brilliant’s guide: More about identifying wires.
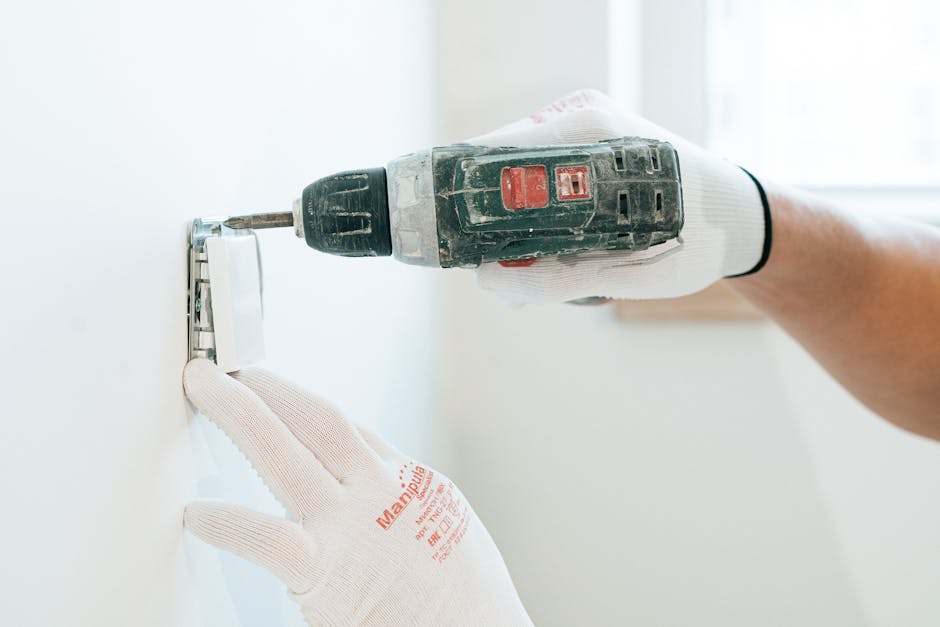
The Step-by-Step Guide to Installing a Smart Light Switch
With your tools and knowledge ready, it’s time to install the switch. Follow these steps carefully for a safe and effective installing smart light switch project.
Step 1: Safety First! Turn Off the Power
This is the most crucial step for your safety.
- Locate Your Circuit Breaker Panel: Usually a gray metal box in your basement, garage, or a utility closet.
- Identify the Correct Breaker: Find the breaker controlling the light switch. If it’s not labeled, you may need to test breakers until the light goes out.
- Turn Off the Breaker: Flip the identified breaker to the “OFF” position.
- Confirm No Power: Go back to the switch. After removing the wall plate, use your non-contact voltage tester on every wire in the box. The tester must not light up or beep. If it does, go back to the breaker panel. This double-check is non-negotiable.
Step 2: Remove the Old Switch and Identify Wires
With the power confirmed off, you can safely remove the old switch.
- Remove the Wall Plate: You likely did this in the previous step.
- Unscrew the Old Switch: Unscrew the switch from the box and gently pull it out.
- Take a Photo of the Wiring: Before disconnecting anything, take a clear photo. This is your backup plan.
- Label Wires: Use electrical tape to label each wire as you disconnect it.
- Line Wire: The incoming power source.
- Load Wire: Goes to the light fixture.
- Ground Wire: Bare copper or green.
- Neutral Wire: The white wire, if present and connected.
- Traveler Wires: (For 3-way/multi-way switches only) The wires connecting the switches.
Once labeled, carefully disconnect all wires from the old switch.
Step 3: Wire and Install the New Smart Switch
Now it’s time to connect your new switch.
- Read Your Smart Switch’s Instructions: Always follow the specific wiring diagram that came with your switch for safety and proper function.
- Connect the Neutral Wire: Connect the white neutral wire from the wall to the neutral wire on the smart switch using a wire nut.
- Connect the Ground Wire: Connect the bare copper or green ground wire from the wall to the ground wire (or green screw) on the switch.
- Connect Line and Load Wires:
- For Single-Pole Switches: Connect your labeled Line wire to the “Line” terminal and your Load wire to the “Load” terminal on the smart switch.
- For Three-Way/Multi-Way Switches: Follow the manufacturer’s diagram precisely. This typically involves connecting the Line, Load, and Traveler wires to the master and companion switches as instructed. This can be complex, so refer to specific guides for your model:
- Secure Connections: Twist wire nuts on tightly and ensure no bare copper is exposed. Gently tug each wire to confirm it’s secure.
- Push Wires into the Box: Neatly fold the wires back into the box, avoiding crimps.
- Mount the Switch: Secure the switch to the box with the provided screws, making it snug and flush.
- Replace the Wall Plate: Attach the new wall plate.
With the physical installing smart light switch complete, it’s time to bring it online!
Getting Connected: Setup, Features, and Troubleshooting
With the hardware installed, it’s time to connect your switch and explore its features.
Connecting to Wi-Fi and Your Smart Home
This is where your switch earns its “smart” designation.
- Download the App: Find your switch’s brand app (e.g., Kasa, My Leviton, Brilliant) in your app store and create an account.
- Restore Power and Initial Test: Flip the breaker back on. The switch’s LED should start blinking, indicating pairing mode. Test the physical switch to ensure it works. If not, turn the power off and re-check your wiring.
- Pairing the Switch: Follow the in-app instructions. This usually requires connecting your phone to your home’s 2.4GHz Wi-Fi network, as most switches don’t support 5GHz for setup. Give the switch a clear name like “Kitchen Lights” for voice commands.
- Integrating with Voice Assistants: In your Alexa or Google Home app, enable the “skill” for your switch’s brand to allow voice control (e.g., “Alexa, turn on the kitchen lights”).
Exploring Advanced Smart Features
Beyond basic on/off, smart switches offer features for convenience, security, and efficiency.
- Schedules and Timers: Set lights to turn on at sunset or off at bedtime. This is great for routines and energy savings.
- Creating Scenes: Combine multiple smart devices into one command, like a “Movie Night” scene that dims lights and adjusts the thermostat.
- Dimming Control: If you installed a dimmer, you can precisely control brightness via the app or voice commands.
- Vacation Mode: This feature randomly turns lights on and off to simulate occupancy, deterring intruders while you’re away from your Northeast Ohio home.
- Energy Monitoring: Some advanced switches track energy use, helping you identify savings opportunities.
Common Troubleshooting Steps
If things don’t work on the first try, here are some common fixes:
- Switch Not Working (No Power to Light):
- Check the Breaker: Ensure the circuit breaker is in the “ON” position.
- Verify Wiring: Turn the power off and double-check that the line, load, and neutral wires are secure and in the correct terminals.
- Lights Flickering:
- Bulb Compatibility: If using a smart dimmer, ensure your bulbs are rated as “dimmable.”
- Load Requirements: Check that your total bulb wattage is within the switch’s specified minimum and maximum load.
- Wi-Fi Connection Issues:
- 2.4GHz Network: Confirm you are connecting to a 2.4GHz Wi-Fi network, not 5GHz.
- Signal Strength: Ensure the switch has a strong Wi-Fi signal. You may need a Wi-Fi extender.
- Resetting the Switch: Try resetting the switch (usually by holding a button) and restarting the pairing process per the manual.
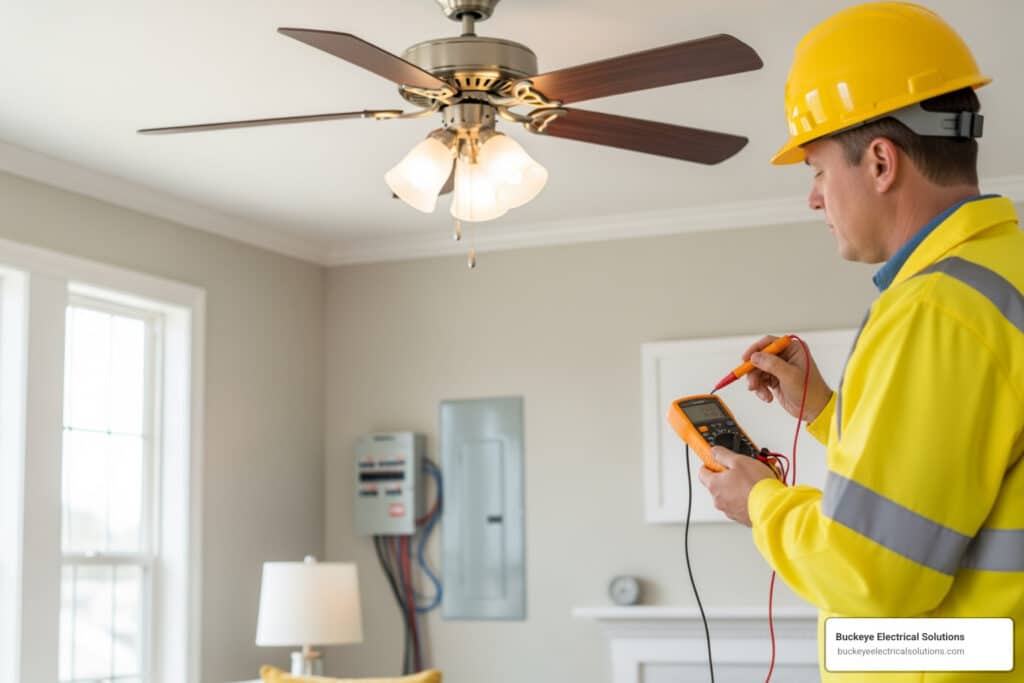
DIY vs. Pro: When to Call an Electrician
While installing smart light switch technology is a great DIY project for many, electrical work has risks. Knowing when to call a professional is the smartest decision you can make.
When to DIY
You’re a good candidate for DIY installation if:
- Modern Wiring (Post-1980s): Your home has standardized wiring, likely including a neutral wire.
- Single-Pole Switch Replacement: You’re replacing a simple, single on/off switch.
- You Have the Right Tools: You have all the necessary tools, especially a voltage tester.
- You Understand Electrical Safety: You are comfortable turning off power, testing for live wires, and making secure connections.
When to Call a Professional
Calling a licensed electrician is a necessity for safety and code compliance in these scenarios:
- Complex 3-Way or 4-Way Wiring: Multi-way switch setups can be tricky. If you’re unsure, call an expert.
- Aluminum Wiring: Found in some homes from the 1960s-70s, this requires special handling by a professional to prevent fire hazards.
- No Neutral Wire in the Box: If you can’t find a neutral wire and don’t have a “no-neutral” switch, an electrician can assess the situation.
- You Are Uncomfortable with Electrical Work: If you feel uncertain at any point, stop and call a professional. Your safety is not worth the risk.
- For Peace of Mind: Hiring a certified professional ensures the job is done correctly and up to code.
For all your residential electrical needs, including expert installing smart light switch services in Northeast Ohio, Buckeye Electrical Solutions is here to help. With over 20 years of experience, we provide quality repair, installation, and maintenance with exceptional service and prompt project completion.
Frequently Asked Questions about Installing a Smart Light Switch
Here are answers to some of the most common questions we receive.
What’s the difference between a single-pole and a three-way switch?
A single-pole switch controls a light from one location. A three-way switch controls a single light from two locations (e.g., top and bottom of stairs). You must buy the correct smart switch type for your circuit—either a single-pole model or a three-way kit that includes a companion switch.
Can I install a smart switch if I don’t have a neutral wire?
Yes, but you must buy a specific “no-neutral” smart switch. Most standard smart switches require a neutral wire to function. No-neutral models are a great solution for older homes but may have different features or require a hub, so check the product details carefully.
Do smart switches work with all types of light bulbs?
Generally, yes. They work with LED, CFL, and incandescent bulbs. However, if you are installing smart light switch with dimming capabilities (a smart dimmer), you must use dimmable bulbs to prevent flickering and damage. Also, always check the switch’s maximum wattage (load) limit to avoid overloading it, which can be a fire hazard.
Your Smart Home Upgrade Starts Here
Upgrading to smart switches is a fantastic way to add convenience, security, and efficiency to your home. For many homeowners with modern wiring, this guide provides the steps for a successful DIY installing smart light switch project. Always prioritize safety, and never hesitate to seek professional help when you’re in doubt. For homeowners in Northeast Ohio looking for a flawless, professional installation, Buckeye Electrical Solutions is here to help. Explore Our Services to get started.