Introduction: The “Lowdown” on Downrods
Ceiling fan downrod installation involves attaching an extension rod to lower your fan for better air circulation and safety. Here’s a quick overview:
- What it is: A metal tube that lowers your ceiling fan.
- When you need it: For ceilings 9 feet or higher, sloped ceilings, or when blades are too close to the ceiling.
- Key safety rules: Fan blades must be at least 7 feet from the floor and have 8 inches of clearance from the ceiling.
- Main steps: Turn off power, attach the downrod to the motor, mount to the ceiling bracket, connect wires, and secure the canopy.
A properly installed downrod serves three key functions: it ensures a safe height (at least seven feet from the floor), improves performance by positioning blades for optimal airflow, and creates a balanced, proportional look in rooms with high or angled ceilings.
Common installation issues include short wires, incompatible parts, or using an electrical box not rated for a fan’s weight and motion. These problems can lead to wobbly fans, electrical faults, or dangerous failures.
I’m Aaron from Buckeye Electrical Solutions. With experience in permitted electrical projects across Northeast Ohio, including complex ceiling fan downrod installations, I’ve created this guide to walk you through each step. You’ll learn how to tackle this project with confidence or recognize when it’s time to call a professional.

Pre-Installation: Choosing the Right Downrod
Gathering the right equipment, especially the correct downrod, is a critical planning phase. Skipping this step can lead to a wobbly fan, poor air circulation, or a safety hazard.

When is a Downrod Necessary?
A downrod is essential for your fan’s performance and safety in several situations:
- High Ceilings: For ceilings 9 feet or higher, a downrod lowers the fan blades into the living space, allowing them to circulate air effectively instead of trapping it near the ceiling.
- Sloped or Vaulted Ceilings: A downrod allows the fan to hang level, preventing the blades from hitting the ceiling and ensuring safe, balanced operation. For slopes greater than 32 degrees, a special angled ceiling mount adapter is required.
- Safety and Performance Clearances: Fan blades should be at least 8 inches from the ceiling for airflow and a minimum of 7 feet from the floor for safety. A downrod helps achieve this ideal positioning, which is typically 8-9 feet from the floor.
For additional background on ceiling fan safety clearances and best practices, you can also review the ceiling fan article on Wikipedia.
How to Determine the Correct Downrod Length
The goal is to position the fan blades 8 to 9 feet from the floor. Use this simple formula:
Ceiling Height - Desired Blade Height (e.g., 9 ft) - Fan Housing Height = Required Downrod Length
For example, with a 12-foot ceiling, a desired 9-foot blade height, and a 1-foot fan housing:
12 ft - 9 ft - 1 ft = 2 ft (24-inch) downrod
Here is a general guide to help you choose:
| Ceiling Height (feet) | Recommended Downrod Length (inches) |
|---|---|
| 8 | Flush mount or 3″ (if possible) |
| 9 | 6″ |
| 10 | 12″ |
| 11 | 18″ |
| 12 | 24″ (2 feet) |
| 13 | 36″ (3 feet) |
| 14+ | 48″ (4 feet) or longer |
Note: These are general recommendations. Always adjust based on your specific fan’s dimensions.
Also, ensure at least 30 inches of clearance between fan blades and any walls or tall furniture.
Ensuring Downrod and Fan Compatibility
Not just any downrod will work. Compatibility is crucial for safety.
- Diameter: The downrod’s diameter (commonly 1/2 or 3/4 inch) must match the opening in your fan’s motor and hanger ball. An incorrect size will cause wobble or won’t fit.
- Attachment Type: Downrods can be threaded or use a pin-and-hole system. Check your fan’s manual to see which type it requires.
- Do Not Reuse Old Downrods: We strongly advise against reusing an old downrod. Differences in diameter, threading, or weight rating can lead to catastrophic failure. Always buy a new downrod specifically designed for your fan model.
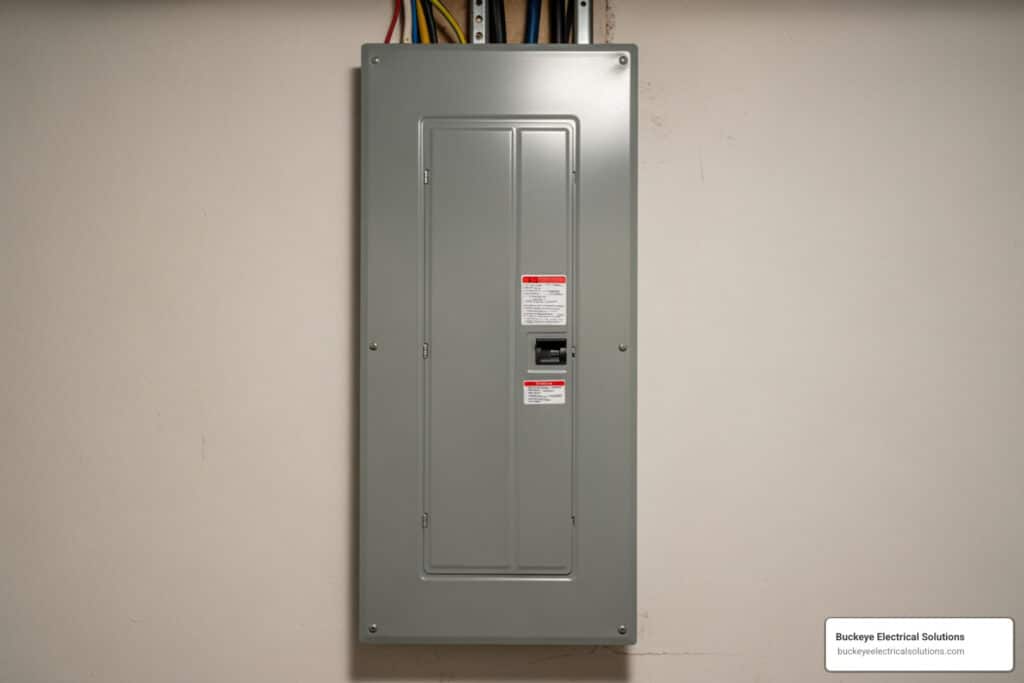
- Electrical Ratings: Ensure all components meet appropriate electrical safety standards and UL listings to comply with local codes in Northeast Ohio.
For assistance with any part of your electrical project, you can learn more about our Residential Electrical Services. We’re here to ensure your home is safe and properly wired.
Tools and Materials for Your Ceiling Fan Downrod Installation
Before we dive into the actual ceiling fan downrod installation, let’s make sure you have everything you need. Gathering the right equipment beforehand is the first step toward a successful and safe installation. We’ve all been there—halfway through a project only to realize we’re missing a crucial tool! Avoid that frustration by prepping your arsenal.

Essential Tools
Having the right tools not only makes the job easier but also safer. Here’s what we recommend you have on hand:
- Sturdy Ladder: You’ll be working overhead, so a stable, non-wobbly ladder is non-negotiable. Don’t take chances with an old, rickety one. Working on a ladder can be dangerous if you have balance issues, and having to work with your hands extended above your head can pose problems, especially if you have shoulder or arm injuries. Safety first!
- Screwdriver Set (Phillips and Flat-head): You’ll need these for various screws on the mounting bracket, fan motor, and canopy.
- Voltage Tester (Non-Contact Preferred): This is your best friend for electrical safety. Always verify that the power is off before touching any wires.
- Wire Strippers and Cutters: Essential for preparing wires for connections and trimming any excess.
- Pliers: Useful for twisting wires together or tightening small nuts.
- Adjustable Wrench: For tightening nuts and bolts on the mounting bracket or downrod assembly.
- Measuring Tape: To confirm ceiling height and downrod length.
- Pencil: For marking screw locations if needed.
Required Materials
Once your tools are ready, let’s gather the components for your fan:
- Ceiling Fan Kit: This includes the fan motor, blades, light kit (if applicable), and usually a short standard downrod.
- Compatible Downrod: The specific length and type you determined in the previous section. Ensure it matches your fan’s diameter and attachment mechanism.
- Fan-Rated Electrical Box: This is absolutely critical. A standard electrical box is NOT designed to support the weight and dynamic forces of a ceiling fan. You need a fan-rated box, which is typically designed to hold at least 35 pounds and is securely anchored to a ceiling joist or bracing. Using a regular box is a serious safety risk and can lead to the fan falling. We’ve seen ‘heavy duty’ boxes that are not ‘fan duty’, and the distinction is crucial for safe installation.
- Wire Connectors (Wire Nuts or Crimp Connectors): For making secure electrical connections. If extending wires, crimp connectors are often preferred for a solid, low-profile splice.
- Electrical Tape: For added insulation and securing wire connections.
- Safety Glasses: Protect your eyes from dust or falling debris when working overhead.
- Gloves: Optional, but can protect your hands.
Having these items ready will streamline your ceiling fan downrod installation process and help ensure a safe and successful outcome.
A Step-by-Step Guide to Ceiling Fan Downrod Installation
Now it’s time for the how-to. Follow these steps carefully for a secure installation. If you feel uncomfortable with electrical work, it’s always best to call a professional electrician like us at Buckeye Electrical Solutions.
Safety First: Power and Preparation
This is the most important step.
- Turn Off Power at the Circuit Breaker: Go to your home’s electrical panel and switch off the breaker for the fan’s location. Do not rely on the wall switch.
- Verify with a Voltage Tester: Use a non-contact voltage tester on the wires in the ceiling box to confirm the power is off. If it beeps or lights up, find the correct breaker.
- Clear the Workspace: Move furniture from below the fan location and lay down a drop cloth to protect your floor.
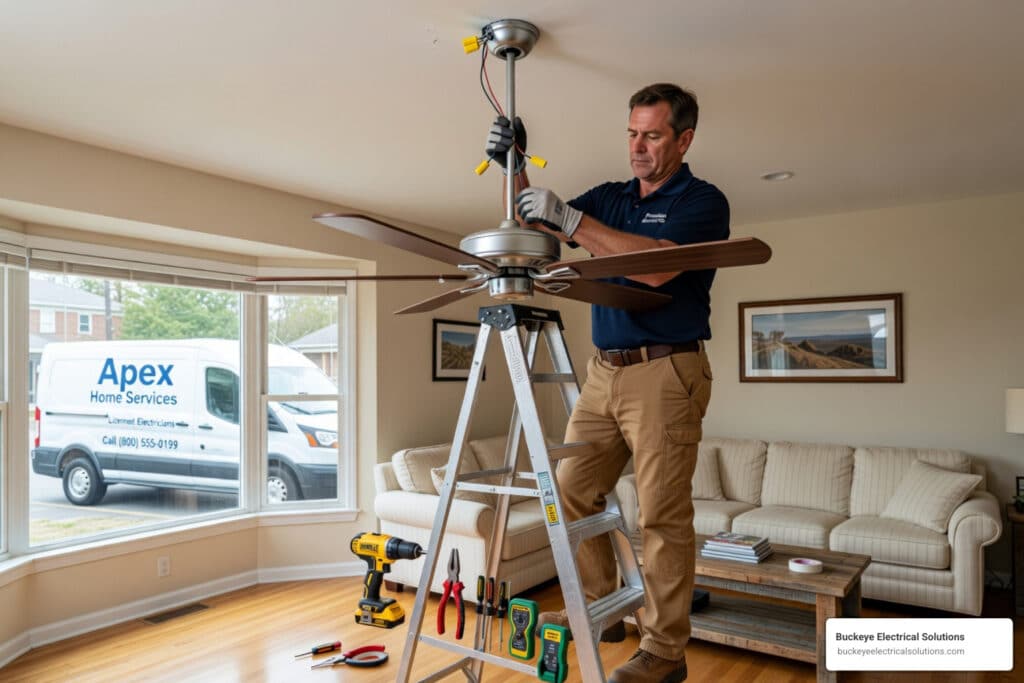
Assembling the Downrod and Fan Motor
This part is best done on the ground before mounting.
- Feed Fan Wires Through the Downrod: Carefully thread the wires from the fan motor through the downrod until they exit the top.
- Secure Downrod to Motor Housing: Align the holes on the downrod and motor housing, then insert and tighten the provided set screws.
- Attach Cotter Pin (if applicable): Insert the cotter pin or R-clip through the hole at the bottom of the downrod. This is a critical safety feature that prevents the downrod from detaching.
- Slide on Canopy and Hanger Ball: Slide the decorative canopy onto the downrod, followed by the hanger ball. Secure the hanger ball with its pin and screw, ensuring the ball’s groove is aligned correctly.
Mounting and Wiring at the Ceiling
Work carefully and take your time during this overhead phase.
- Install the Fan-Rated Mounting Bracket: Securely attach a fan-rated mounting bracket to a ceiling joist or a fan-rated brace. This bracket must be rated to support your fan’s weight.
- Hang Fan Assembly on Bracket: Lift the fan assembly and seat the hanger ball into the mounting bracket. The fan should hang freely, leaving your hands available for wiring.
- Wire Connections: Strip about 1/2 inch of insulation from the wire ends. Twist the matching colored wires together and secure them with wire connectors.
- Black to Black (Hot/Power)
- White to White (Neutral)
- Ground to Ground (Bare copper or green wire to the ground wire from the ceiling and the ground screw on the electrical box).
- Blue/Red Wires: If your fan has a separate light (often a blue wire), connect it to the corresponding wire from the ceiling (often red). Cap any unused wires.
- Important Note: All electrical splices must be made inside the electrical box.
- Extending Wires Safely: If your fan’s wires are too short, you must extend them. Use 14 AWG stranded THHN wire and splice it to the fan wires using electrical crimp connectors or wire nuts. All splices must remain inside the electrical box.
- Tuck Wires and Secure Canopy: Carefully tuck all wires into the electrical box. Slide the canopy up to the ceiling and secure it to the mounting bracket with the provided screws, ensuring no wires are pinched.
Special Cases and Common Problems
Even with careful planning, challenges can arise during a ceiling fan downrod installation. Here are a few common scenarios.
Installing a Downrod on a Sloped or Vaulted Ceiling
Sloped ceilings require extra attention. A downrod is almost always the solution.
- Check Fan’s Angle Rating: Consult your fan’s manual for the maximum slope it can accommodate. Many standard brackets work for angles up to 32 degrees.
- Use a Sloped Ceiling Adapter: For slopes greater than 32 degrees, you must purchase a specialized angled ceiling mount adapter to ensure the fan hangs vertically.
- Ensure Proper Seating: Double-check that the hanger ball is fully seated in the mounting bracket to prevent excessive wobble.
- Verify Blade Clearance: When calculating downrod length, ensure the blades have at least eight inches of clearance from the lowest point of the sloped ceiling throughout their entire rotation.
Common Problems in ceiling fan downrod installation and How to Fix Them
Here are some common issues and their solutions:
- Fan Wobble: A wobbly fan is annoying and unsafe.
- Fix: First, turn off the fan and check that all screws on the mounting bracket, downrod, and motor are tight. Ensure the hanger ball is seated correctly. If it still wobbles, use the blade balancing kit included with most fans to correct any imbalance. Severe wobble may indicate an improper installation or an incompatible downrod.
- Fan Not Working: You flip the switch, and nothing happens.
- Fix: Turn off the power at the circuit breaker. Re-check all wiring connections to ensure they are secure and correct (black to black, white to white, etc.). Also, confirm any pull chains are in the “on” position and that the remote (if applicable) has fresh batteries and is properly paired.
- Wires Too Short: This is common with long downrods.
- Fix: Turn off the power. Extend the wires using 14 AWG stranded THHN wire and secure crimp connectors or wire nuts. All splices must be made inside the fan-rated electrical box. If you are unsure, call a professional.
- Incompatible Parts: The downrod doesn’t fit, or the box isn’t fan-rated.
- Fix: The only safe solution is to return the incorrect parts and purchase the correct, compatible components. Never try to force parts to fit; it is a serious safety hazard.
Frequently Asked Questions about Downrod Installation
We hear a lot of questions from homeowners in Northeast Ohio about ceiling fan downrod installation. Here are some of the most common ones:
How does a downrod affect my fan’s performance and safety?
A downrod is crucial for both. For performance, it lowers the fan blades into the optimal zone for air circulation (typically 8-9 feet from the floor). For safety, it ensures the blades are at least seven feet above the floor and provides stability on sloped ceilings, preventing wobble and potential hazards.
Can I reuse an old downrod from a previous fan?
No. We strongly advise against it. Downrods differ in diameter, threading, and weight rating. An incompatible or old downrod can lead to severe wobble, component failure, or the fan falling. Always use a new downrod specifically approved for your fan model.
Do I need a special electrical box to install a ceiling fan?
Yes, absolutely. You must use a “fan-rated” electrical box that is clearly marked for ceiling fan support. Standard electrical boxes are not designed to handle the weight and dynamic motion of a fan, and using one creates a serious safety risk of the fan falling from the ceiling.
Conclusion: Enjoy a Safer, More Comfortable Room
A proper ceiling fan downrod installation is more than just hanging a fixture; it’s about improving your room’s comfort, safety, and style. By understanding the purpose of a downrod, selecting the correct length and type, and following the installation steps carefully, you can ensure your fan operates efficiently and safely for years to come. From optimizing airflow in a tall living room to providing stability on a beautiful vaulted ceiling, the downrod plays a vital role.
While this guide covers the essential steps for a DIY project, we understand that complex wiring, high vaulted ceilings, or simply the thought of working with electricity can pose significant challenges. For peace of mind and a guaranteed professional result in Northeast Ohio, the experts at Buckeye Electrical Solutions are ready to assist. We have the experience and expertise to handle any ceiling fan downrod installation, ensuring it’s done safely, correctly, and up to code. For help with your project, or to learn more about our comprehensive electrical services, please explore our Residential Electrical Services. We’re always here to brighten your day and keep your home comfortable!