Why Electrical Troubleshooting Skills Matter for Every Homeowner
Electrical troubleshooting is the systematic process of identifying and fixing problems in your home’s electrical system. Whether you’re dealing with a dead outlet, flickering lights, or a tripped breaker, knowing how to diagnose the issue safely can save you time, money, and prevent dangerous situations.
Quick Answer: The 7 Fundamental Steps of Electrical Troubleshooting
- Gather Information – How should the equipment operate? What documentation is available?
- Understand the Malfunction – What part of the system isn’t working correctly?
- Identify Measurable Parameters – What voltage, temperature, or other readings can help?
- Isolate the Source – Use data and testing to pinpoint the problem location
- Correct the Component – Repair or replace the damaged part
- Verify the Repair – Confirm the system now runs as required
- Perform Root Cause Analysis – Determine why the failure happened to prevent recurrence
As Murphy’s Law would predict, electrical control system issues usually happen with the worst possible timing. A blown fuse, a dead circuit, or mysteriously flickering lights rarely announce themselves during convenient daylight hours. Instead, they tend to strike when you need power most.
The key difference between a quick fix and hours of frustration comes down to having a plan. Research shows that proper diagnosis of electrical circuits is critical to successfully repairing systems the first time. When you stop troubleshooting without finding the root cause, the system will break again—often creating callbacks and wasted effort.
The most common electrical circuit faults you’ll encounter are open circuits (broken connections), short circuits (unintended paths to ground), and high resistance (poor connections causing voltage drop). Each has distinct symptoms and requires specific diagnostic methods. When measuring voltage on any circuit, you should never open the circuit—a fundamental rule that prevents misleading “ghost voltage” readings.
Understanding basic electrical theory, like Ohm’s Law, combined with systematic testing methods can help you identify issues faster and more accurately. The “hopscotch method”—the most common diagnostic approach—involves following the flow of electricity and checking voltage at each component until you find where it drops to zero.
I’m Aaron, and as the owner of Buckeye Electrical Solutions, I’ve overseen dozens of permitted electrical troubleshooting projects across Northeast Ohio, from diagnosing intermittent shorts in 6,000 sq ft commercial rewires to tracking down mysterious voltage drops in residential panels. Whether you’re tackling basic electrical troubleshooting yourself or need expert help, understanding this systematic approach will help you communicate more effectively with professionals and know when it’s time to call for backup.
 clipboard for gathering information, 2) broken circuit symbol for understanding malfunction, 3) voltage meter for identifying parameters, 4) magnifying glass for isolating source, 5) wrench for correcting component, 6) checkmark for verifying repair, 7) lightbulb for root cause analysis - electrical troubleshooting infographic infographic-line-3-steps-elegant_beige")
The Foundation: A 7-Step Troubleshooting Framework
Electrical problems can feel like trying to solve a puzzle with half the pieces missing. But just like any good puzzle, there’s a methodical way to approach it. At Buckeye Electrical Solutions, we’ve found that a structured, seven-step process is the most effective way to tackle any electrical issue, big or small. This framework helps us save time, accurately diagnose problems, and ensure they don’t pop up again next week.

Here’s a closer look at the fundamental steps involved in electrical troubleshooting:
- Step 1: Gather Information. Before we even think about grabbing a tool, we start by asking questions. How is the equipment supposed to operate? What technical documentation (like wiring diagrams or manuals) is available? Has someone familiar with similar equipment experienced this issue before? Getting a clear picture of the normal operation and the symptoms helps us avoid chasing ghosts. This initial information gathering is the first crucial step, providing the baseline for diagnosis.
- Step 2: Understand the Malfunction. What part of the process is not functioning correctly? We need to understand the role of the malfunctioning equipment in the overall system. Is it a light that won’t turn on, or an entire circuit that’s dead? Understanding the malfunction helps us narrow down the potential problem areas.
- Step 3: Identify Measurable Parameters. This is where our diagnostic tools start to come into play. Are there voltage readings, temperature readings, or other parameters that would help evaluate the source of the problem? Identifying what can be measured to detect out-of-range parameters is key. For instance, a voltage reading of 0V where there should be 120V immediately tells us there’s an issue with power delivery.
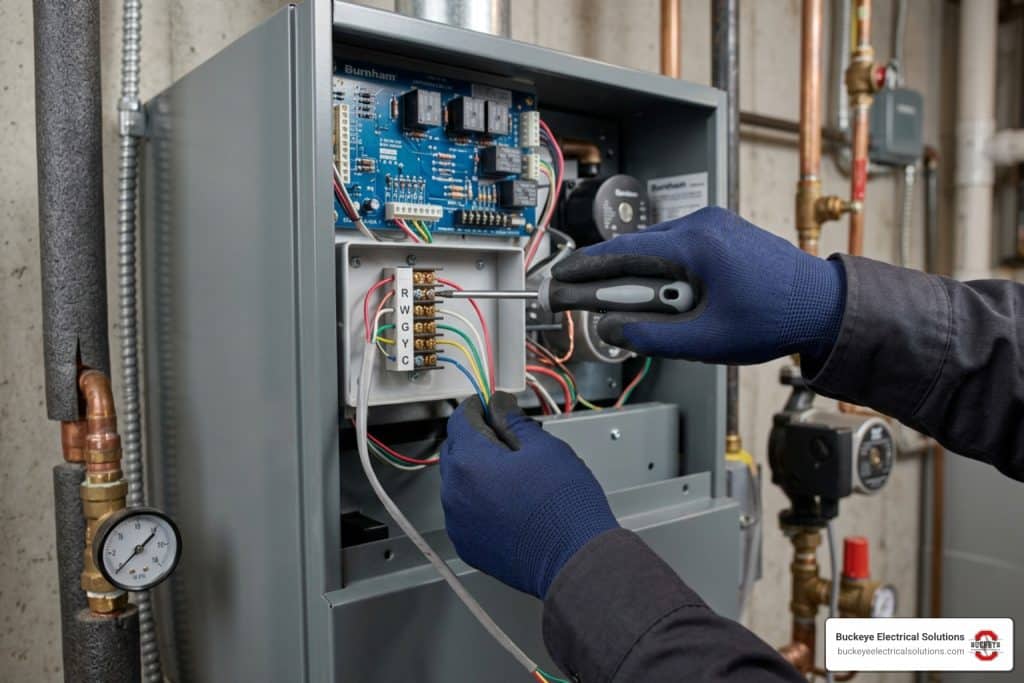
- Step 4: Isolate the Source. With information and measurements in hand, we use data and analytical tools to pinpoint the specific source of the problem. This often involves dividing the circuit into smaller sections, a technique we’ll discuss later. Our goal is to isolate the faulty component or connection.
- Step 5: Correct the Component. Once the problem is identified, we proceed with the repair. This might mean replacing a damaged wire, a faulty outlet, or a worn-out breaker.
- Step 6: Verify the Repair. Just fixing something isn’t enough. We must always verify the repair after completion to ensure the system runs as required. Does the light turn on now? Does the breaker hold? This step ensures we haven’t introduced new problems or overlooked underlying issues.
- Step 7: Perform Root Cause Analysis. This final step is often overlooked but is incredibly important. What really caused the malfunction? Was it just a loose wire, or was the circuit consistently overloaded? Performing a root cause analysis helps us determine the underlying cause and implement a permanent solution, preventing the problem from reoccurring.
A Systematic Approach to Electrical Troubleshooting
Why go through all these steps? Because a systematic approach is your best friend in electrical troubleshooting. It prevents misdiagnosis, which, as we know, is the main cause of callbacks in the skilled trades. By being methodical, we save time and money in the long run. We avoid the frustration of guessing and replacing parts unnecessarily.
A planned, step-by-step process ensures that we don’t miss anything. It’s about being prepared and thinking logically, rather than haphazardly poking around with a multimeter. This approach is what allows our team at Buckeye Electrical Solutions to consistently deliver exceptional service and prompt project completion across Northeast Ohio.
Why Root Cause Analysis is Crucial
“A blown fuse indicates that the system had too much current. You should look for the reason the system has too much current. Do not just replace the fuse.” This statistic perfectly illustrates why root cause analysis is so important. If we just replace a blown fuse, we’re only treating the symptom. The underlying issue—perhaps an overloaded circuit or a short—will just cause the new fuse to blow again, leading to repeated failures and potential hazards.
Root cause analysis helps us find the “why” behind the failure. Was it a faulty appliance, a deteriorating wire, or simply too many devices plugged into one circuit? One major problem can make several smaller problems in the system, so finding that original cause is key. If you stop troubleshooting without finding the root cause, the system will break again. By identifying the true cause, we can implement a lasting solution and prevent future issues.
For more information about how we apply these systematic solutions to your home’s electrical needs, please explore More info about our Residential Electrical Services.
Diagnosing the 3 Most Common Circuit Faults
When we talk about electrical troubleshooting, we often encounter a few recurring culprits. The most common electrical circuit faults are open circuits, short circuits, and high resistance. Understanding these three fundamental types of failures is like knowing the basic anatomy of electrical problems – it gives us a head start in diagnosing what’s going wrong.

Identifying and Fixing Open Circuits
An open circuit is essentially a break in the electrical path, preventing current from flowing. Think of it like a bridge that’s out – nothing can cross. This can be caused by a broken wire, a loose connection, a faulty switch, or even a burnt-out light bulb. If only one light is out, it might just be the bulb. If a few lights or outlets have no power, it could be a loose connection in an electrical box or a switch.
To identify an open circuit, we can use a multimeter set to continuity mode. If the meter shows “OL” (open line) or doesn’t beep when testing across a component or wire that should have continuity, you’ve likely found a break. Alternatively, we can use point-to-point voltage checks. With the circuit energized (and being extremely careful!), we measure voltage at various points. If we have voltage at one point and then none at the next, the open is between those two points.
Intermittent open circuits, especially those caused by loose wire connections, can be tricky. This is where the ‘wiggle test’ comes in handy. While the circuit is operating, gently wiggle wires and connectors. If the power comes and goes, or you hear a crackling noise, you’ve likely found a loose connection causing an intermittent open. A loose wire connection can cause the wire to overheat, eventually causing the connection to fail.
Methods for Troubleshooting Short Circuits
A short circuit occurs when electricity takes an unintended, low-resistance path, bypassing the normal load. This often results in a sudden surge of current, which typically causes a fuse to blow or a circuit breaker to trip. A circuit breaker that trips right away usually indicates a short. “A blown fuse indicates that the system had too much current. You should look for the reason the system has too much current. Do not just replace the fuse.” This is crucial advice.
To troubleshoot a short circuit, we often use the ‘divide and conquer’ strategy. If a fuse keeps blowing, we can unplug accessible devices or subcircuits. If the fuse still blows, we systematically disconnect sections of the circuit until the fuse no longer blows, thus isolating the problematic section. One clever trick for “fuse-eating circuits” is to replace the blown fuse with a headlight. This limits the total circuit amperage to the lamp’s amps and provides a visual indicator: the light will glow brightly when the short is present and dim or go out when the short is removed.
For more detailed guidance on diagnosing outages, check out this Electrical Outage Diagnostic Flowchart.
Detecting High Resistance and Voltage Drop
High resistance in a circuit isn’t a complete break like an open circuit, but it’s like a kink in a hose – it restricts the flow of electricity. This “unwanted resistance” consumes voltage and can lead to components not receiving enough power, causing them to malfunction or operate inefficiently. It can also generate heat, which is always a red flag in electrical systems.
The best way to detect and diagnose unwanted resistance is by performing voltage drop measurements. Voltage drop is the voltage consumed by resistance in the circuit. In a healthy circuit, voltage should only “drop” or be “used” at the load (e.g., a light bulb, a motor). If you measure a significant voltage drop across a wire, a connection, or a switch, that indicates unwanted resistance.
We measure source voltage (at the power supply), available voltage (at the component), and then the voltage drop across specific segments. For example, if your source voltage is 120V and you only measure 100V at your load, you have a 20V voltage drop somewhere in between. A good rule of thumb is to look for voltage drops of less than .1 volt per connection in power circuits. Anything above that suggests a problem.
Signs of high resistance can include flickering lights, dimming lights, or appliances not performing as expected. A loose connection, a corroded terminal, or a damaged wire can all cause high resistance. These issues can also cause a crackling noise or even a burning smell, which are serious warning signs to address immediately.
Essential Tools and Techniques for Electrical Troubleshooting
Having the right tools and knowing how to use them is half the battle in electrical troubleshooting. Just like a chef needs the right knife, we need our multimeters and diagrams.
Mastering Your Diagnostic Tools
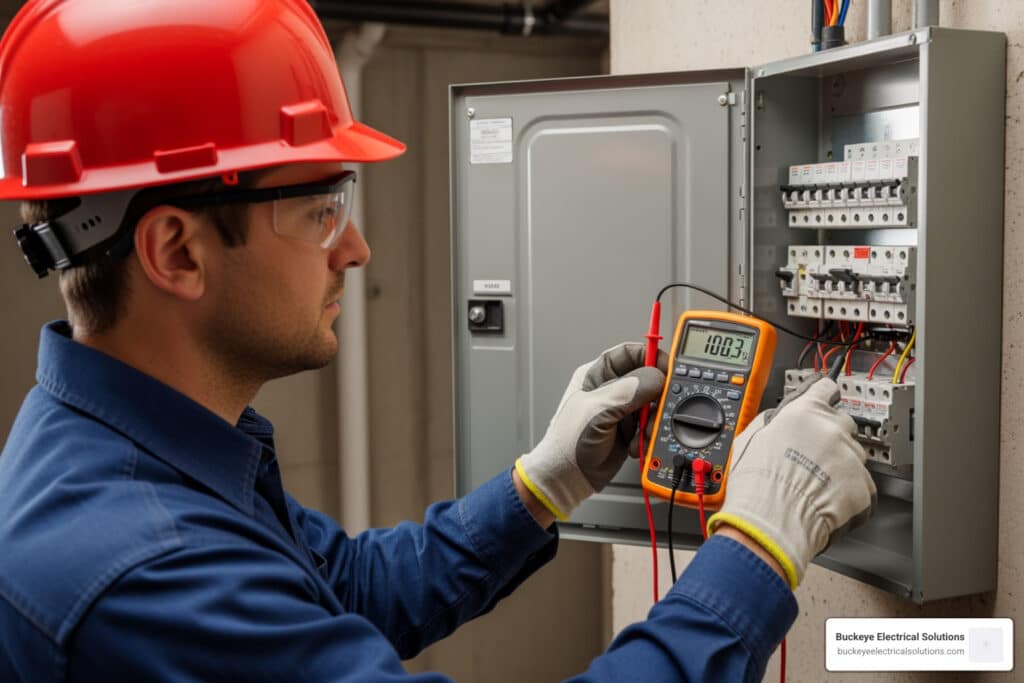
Your most versatile companion in electrical diagnosis will be a multimeter. This incredible device allows us to measure voltage (AC and DC), current (amperage), and resistance (ohms), as well as test for continuity.
- Voltage Measurement: When measuring voltage, the circuit must be ON. We use this to confirm power is present or to identify where power is lost. As a critical safety note, when measuring voltage on any circuit, NEVER OPEN THE CIRCUIT. Disconnecting wires during voltage checks can lead to misleading “open circuit readings” which don’t reflect the true state of the circuit’s resistance when connected.
- Continuity Testing: This checks for a complete path for electricity. It’s invaluable for identifying open circuits or confirming a wire isn’t broken.
- Resistance Measurement: Used to check the internal resistance of components or wires when the circuit is de-energized.
Understanding basic electrical theory, like Ohm’s Law (Voltage = Current x Resistance), can greatly aid in troubleshooting. If you know the voltage and resistance, you can calculate the expected current. If your actual current is much lower, you might have high resistance elsewhere, or an open circuit.
Another indispensable tool is the clamp meter. While a multimeter measures current by breaking the circuit, a clamp meter allows us to measure amperage by simply clamping around a wire, without interrupting the flow of electricity. This is particularly useful for checking if a component is “overamping” (drawing too much current) or to confirm current flow without disconnecting anything.
For more complex or intermittent issues, tools like a Power Probe can be helpful. A Power Probe can energize components directly, allowing us to test their functionality in isolation. This can be especially useful in commercial settings or when dealing with intricate control systems.
Our team at Buckeye Electrical Solutions is equipped with a full arsenal of these tools, ensuring we can handle any electrical troubleshooting challenge in your commercial facility. Find more about our capabilities at More info about our Commercial Electrical Services.
Leveraging Wiring Diagrams and the ‘Hopscotch Method’
Wiring diagrams are like roadmaps for electrical systems. They show us the components, how they are wired, and the intended flow of current. For more complex systems, especially in industrial or commercial applications, you’ll often encounter ladder diagrams, which simplify the representation of control circuits. Understanding the ‘line side’ (typically 240V, powering loads like motors) and the ‘control side’ (typically 24V, handling relays, safeties, and thermostats) of a wiring diagram is crucial. The line side usually handles the heavy lifting, while the control side manages the logic.
The ‘hopscotch method’ is a systematic approach to using these diagrams for troubleshooting, and it’s often considered the most common method. Here’s how it works:
- Start at the Power Source: Begin at the known power source on your wiring diagram.
- Follow the Flow: “Hop” from one component or connection to the next, following the intended path of electricity.
- Measure Voltage at Each “Hop”: At each point, measure the voltage.
- Find the Drop: Continue until you find a point where the voltage suddenly drops to zero or significantly below its expected value.
The problem lies between the last point where you had correct voltage and the first point where the voltage was incorrect. This systematic “following the flow of current” helps isolate faulty components or breaks in the circuit quickly and efficiently, preventing you from checking many things that are going to check out as OK.
Common Pitfalls and When to Call a Professional
Even with the best tools and a systematic approach, electrical troubleshooting can have its challenges. Complex systems, like those controlled by PLCs (Programmable Logic Controllers) in commercial or industrial settings, require specialized knowledge. When troubleshooting PLCs, the problem is almost always on the output side, typically at the final control element, rather than in the PLC logic itself, as logic doesn’t wear out like mechanical components.
Troubleshooting specific components like capacitors and motors also requires a nuanced approach. A humming motor that isn’t running, for instance, often indicates a seized motor. Capacitors, critical for motor starting and smooth operation, can degrade over time and must be tested for capacitance within a 10% tolerance of their rated value.
Common Pitfalls in Electrical Troubleshooting
- Disconnecting Wires During Voltage Checks: As mentioned, this is a big no-no. It creates an open circuit, leading to misleading readings. Always measure voltage with the circuit intact and energized (safely, of course!).
- Replacing Parts Without Diagnosis: This is the “shotgun approach” – replacing component after component hoping to stumble upon the fix. It’s expensive, time-consuming, and often doesn’t solve the root problem.
- Ignoring Safety Protocols: Electricity is dangerous. Always wear appropriate PPE, ensure circuits are de-energized when performing resistance or continuity tests, and never work on live circuits unless absolutely necessary and with proper training.
- Overlooking Bad Grounds: Bad grounds can cause a variety of seemingly random problems. Whenever you have multiple electrical complaints, especially in a vehicle or complex system, you should home in on the grounds very early in the diagnostic process. A faulty ground can manifest as flickering lights, strange behaviors, or even complete component failure.
When to Call for Expert Help
While we encourage homeowners to understand basic electrical troubleshooting, there are definite times when it’s smart—and safest—to call in the professionals.
- Whole-House Power Issues: If your entire home is without power, or if multiple circuits are affected, this often points to a problem beyond a simple outlet or switch, potentially at the main panel or even with the utility company.
- Repeatedly Tripping Breakers: If a circuit breaker trips frequently and you’ve already checked for overloaded appliances, it indicates a more serious underlying issue like a persistent short or faulty wiring that needs expert diagnosis.
- Signs of Arcing (Burning Smell, Buzzing): Any burning odors, sizzling, popping, or buzzing sounds coming from your electrical outlets, switches, or panel are urgent warning signs of electrical arcing. This is extremely dangerous and can lead to fires. Call an electrician immediately.
- Problems Affecting Multiple Circuits: If issues seem to be spreading beyond a single circuit, it suggests a problem with your main electrical panel or service entrance.
- When You Feel Unsafe or Unqualified: This is perhaps the most important rule. If you’re unsure, uncomfortable, or dealing with anything beyond a basic fix, don’t risk it. Electrical work can be hazardous, and improper repairs can lead to serious injury or fire.
At Buckeye Electrical Solutions, we have over 20 years of experience providing quality residential and commercial electrical repair, installation, and maintenance across Northeast Ohio. We’re known for our exceptional service and prompt project completion. When it’s time to bring in an outside resource, providing us with detailed information from your initial troubleshooting steps can speed up our diagnosis. Don’t hesitate to reach out to us for any complex or dangerous electrical issues. You can always Contact Us for professional assistance.
Conclusion
Electrical troubleshooting doesn’t have to be a frustrating mystery. By adopting a methodical, step-by-step process—from gathering information and understanding the malfunction to performing root cause analysis—you can effectively identify and resolve many common electrical issues. Remember to always prioritize safety, use your diagnostic tools wisely, and leverage resources like wiring diagrams.
While a systematic approach empowers you to tackle many problems, recognizing when to call for expert help is equally important. For complex, dangerous, or persistent electrical issues in Northeast Ohio, trust the experienced professionals at Buckeye Electrical Solutions. We’re here to ensure your electrical systems are safe, reliable, and functioning perfectly.
Explore our comprehensive electrical services to ensure your home or business is safe and functional.